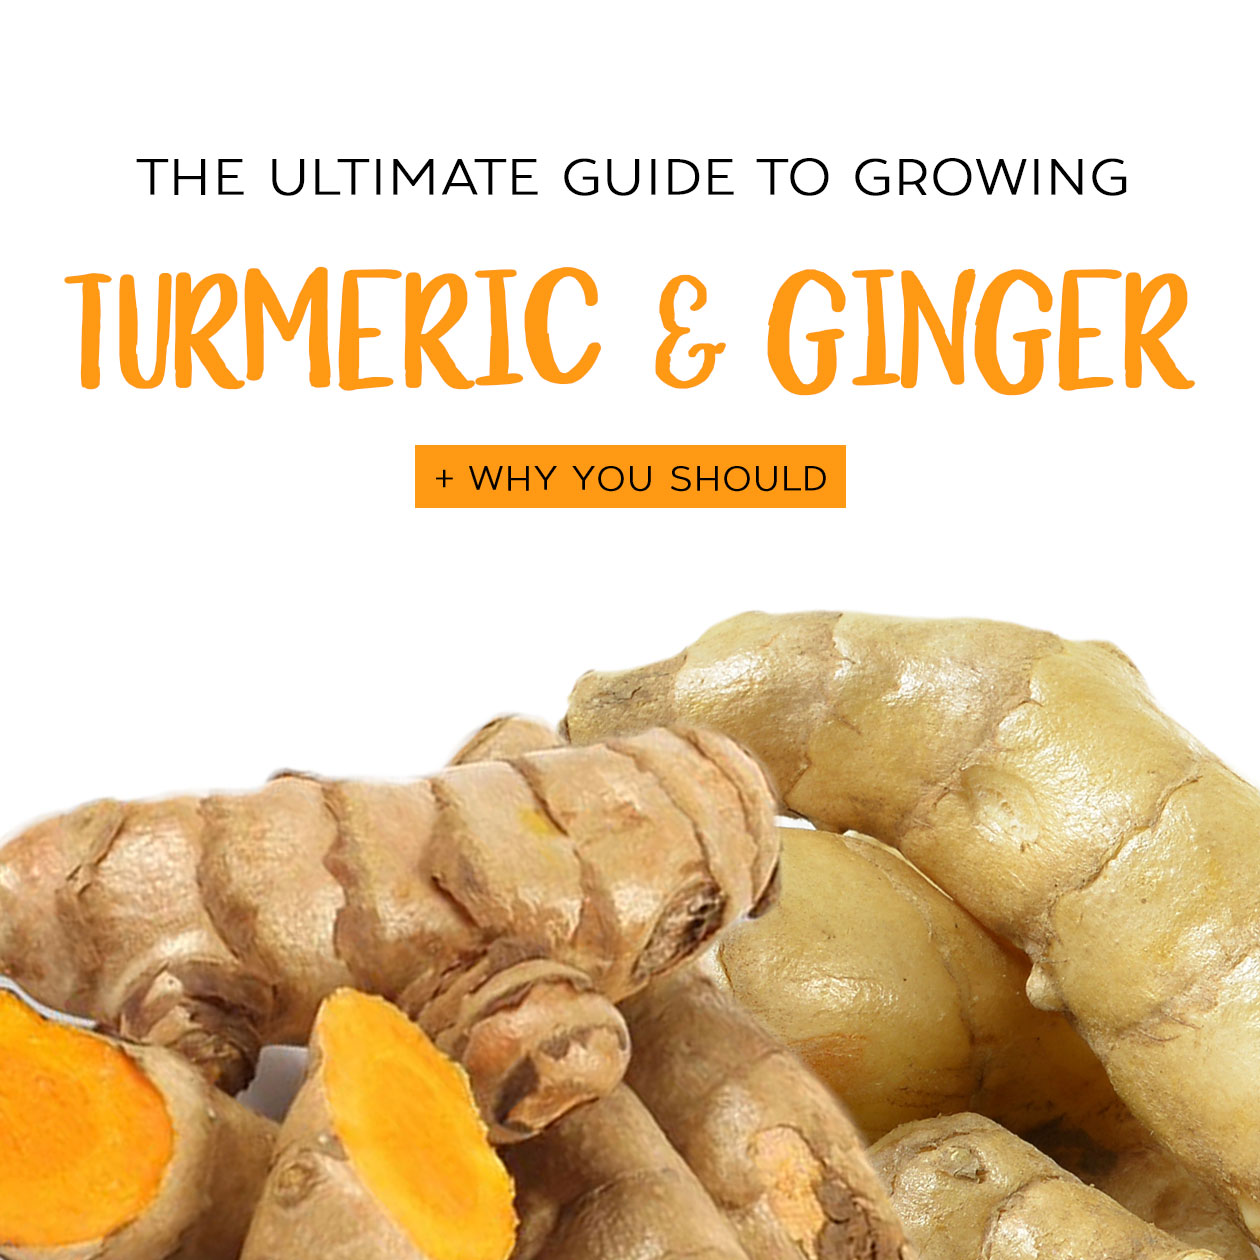
The Ultimate Guide to growing Turmeric & Ginger (+ why you should!)

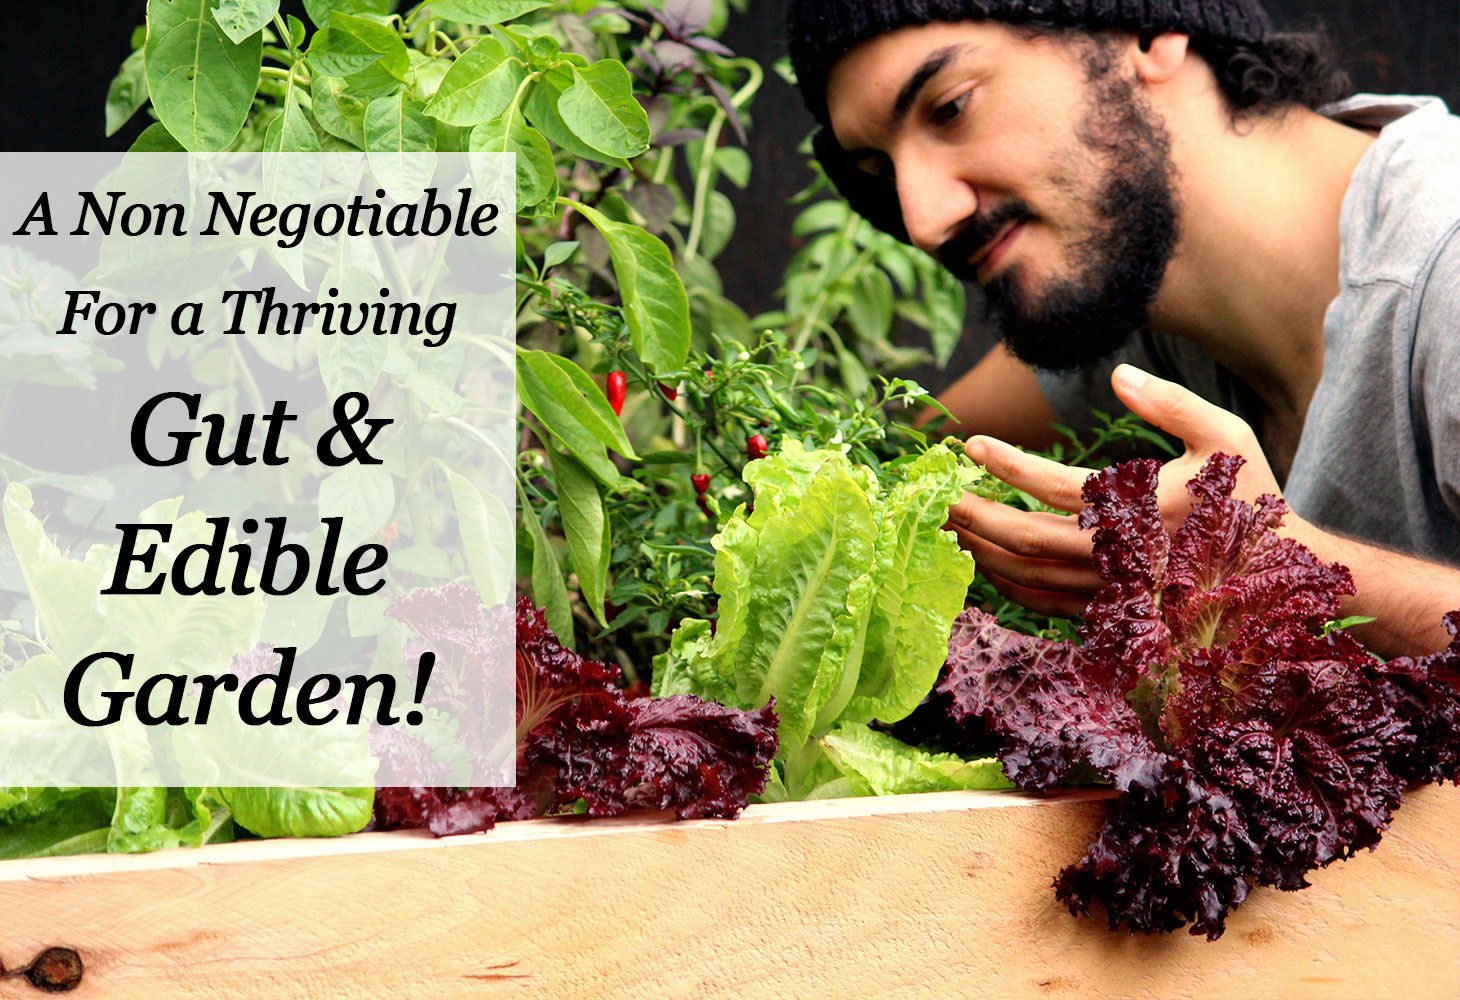
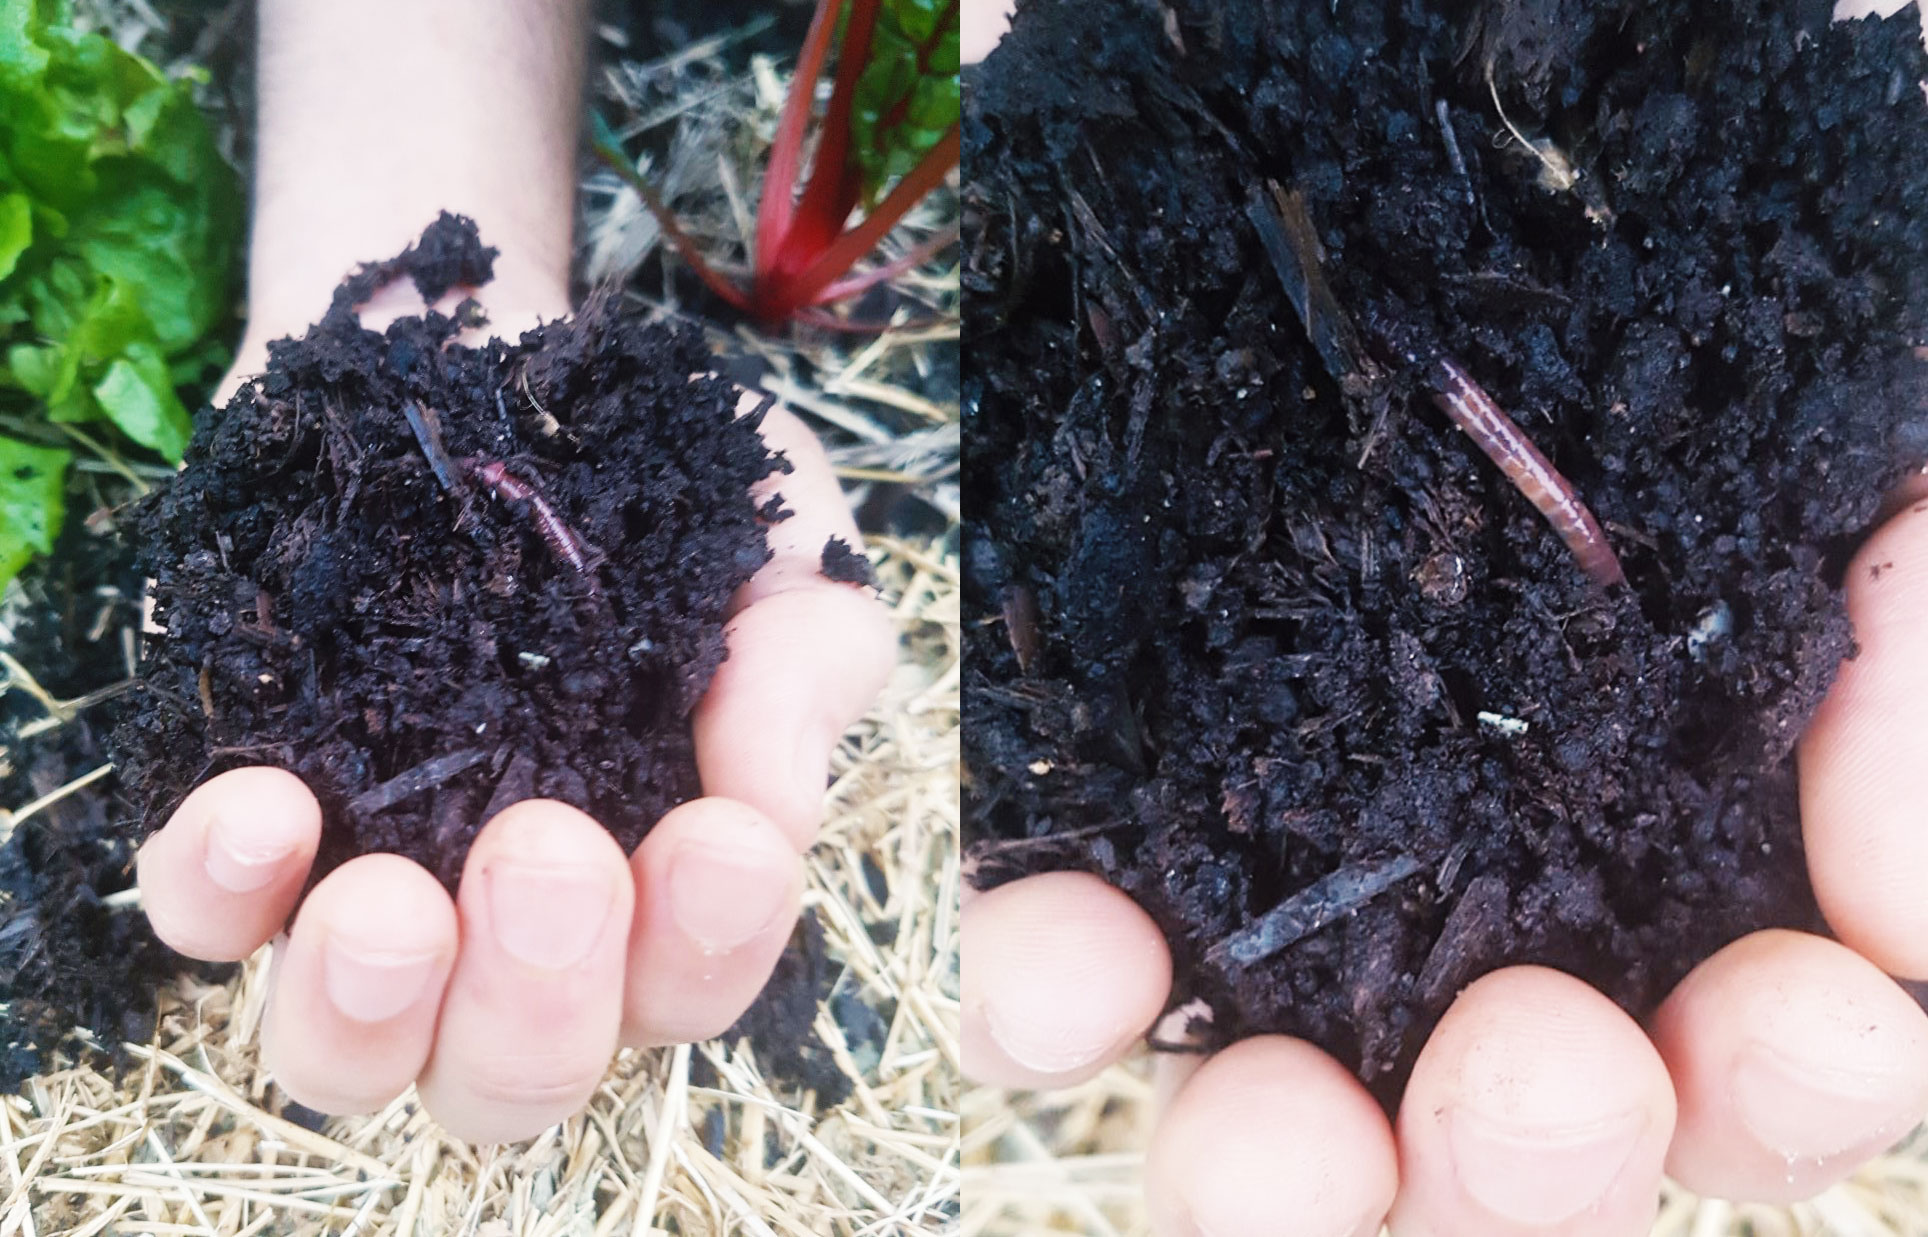
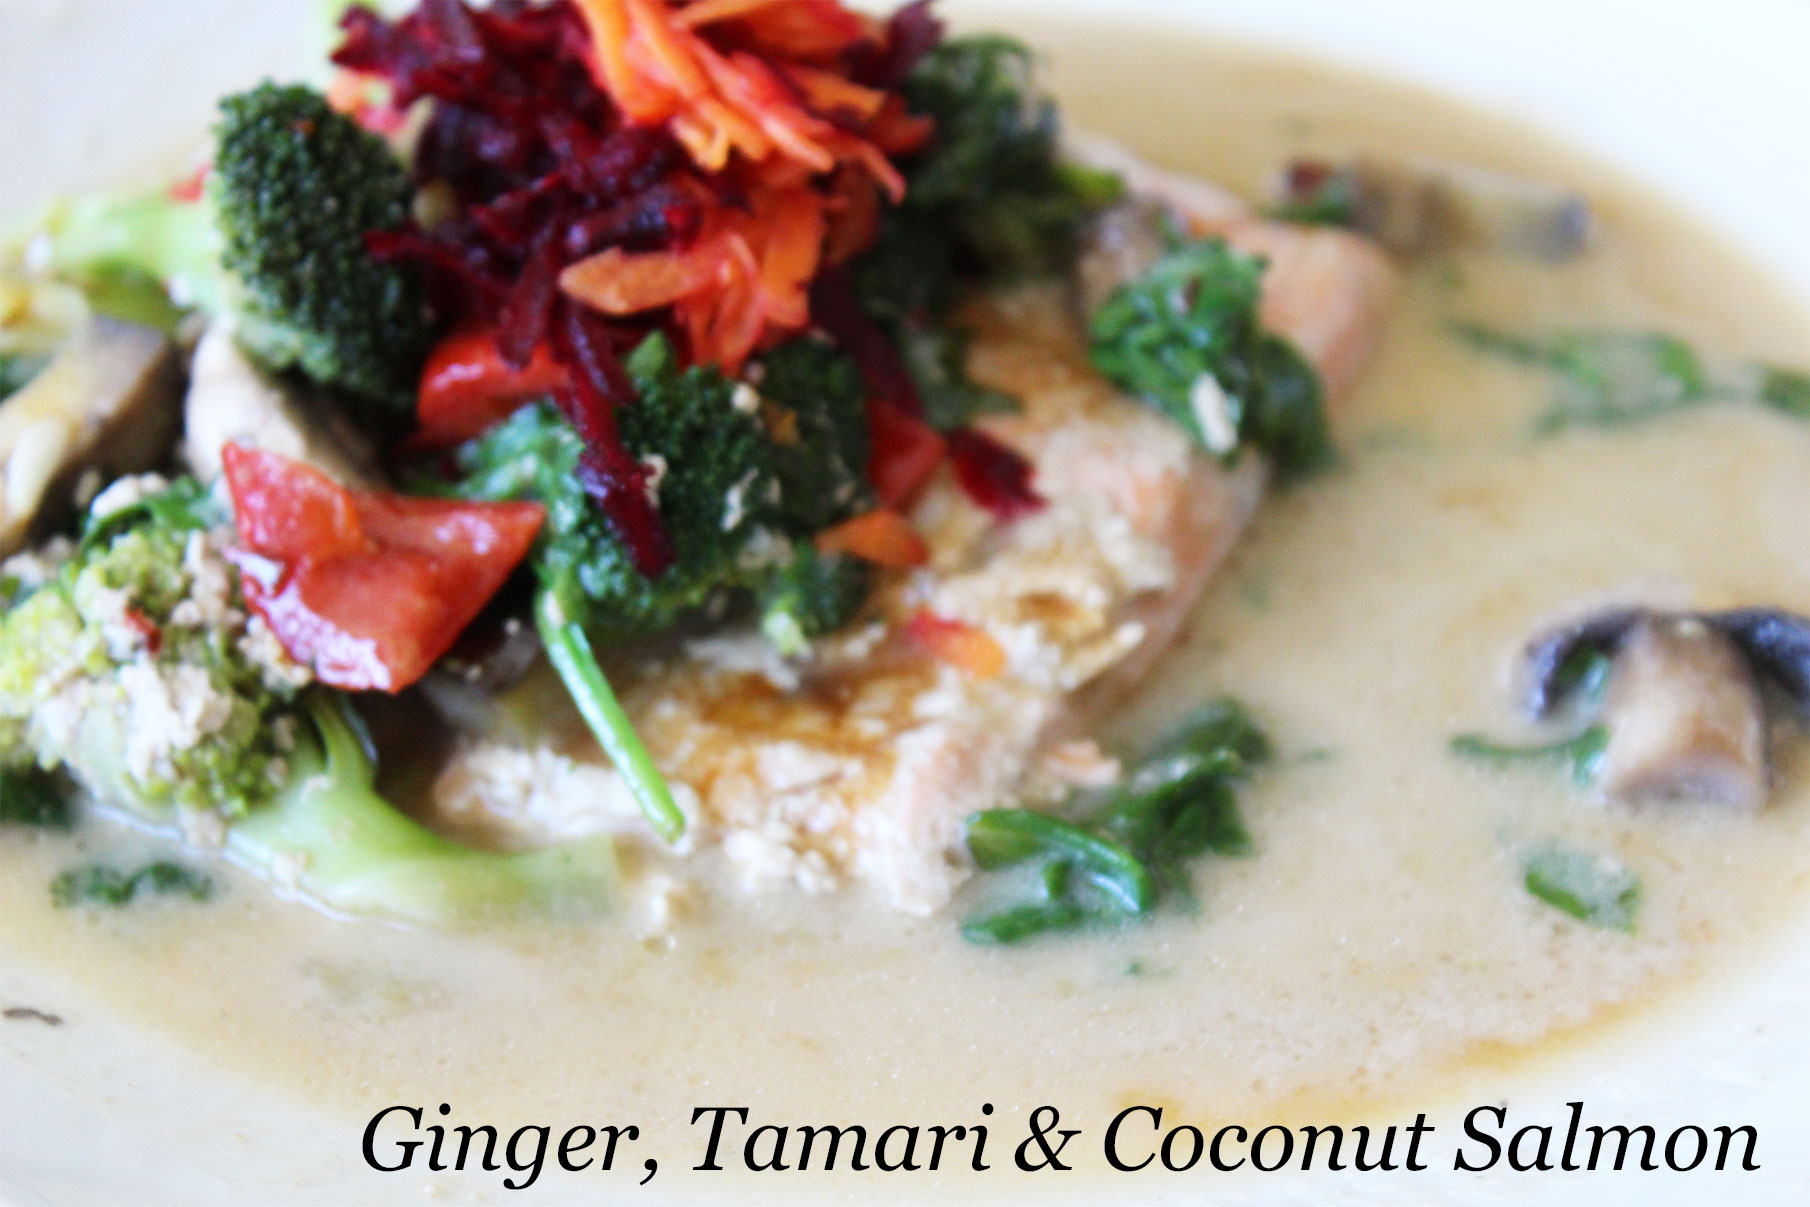
Having immediate access to your own beautiful, organic & nutrient dense wholefoods is literally life changing.

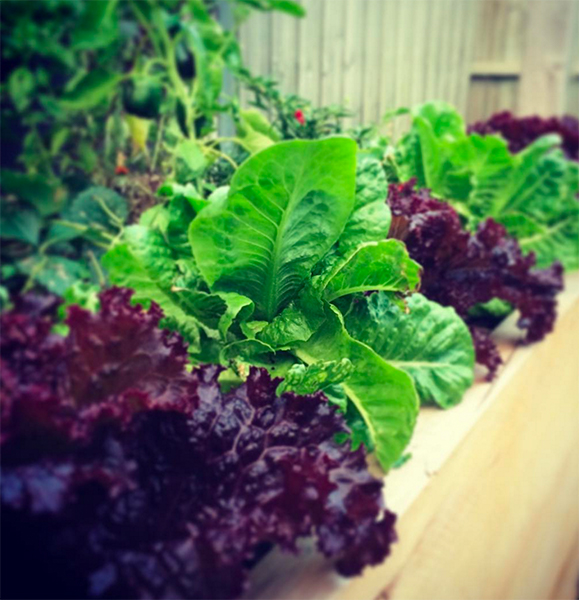
And with the right amount of nutrients in your soil, there isn’t much you can’t grow…. It’s for this reason that we want to encourage you to step out of that lettuce cage & broaden your horizons a little!

We want to challenge you to consider growing something you’ve likely never considered before.

We want to challenge you to grow your own Turmeric & Ginger!

…And for good reason!

Now if you didn’t already know, we wholeheartedly believe & live by the mantra “Food is Medicine”

When it comes to good health organic wholefoods are where it’s at… But Turmeric & Ginger?

These guys are on a whole other level.

They are two of most researched medicinal plants in the history of science & when you look at their (almost) unbelievable benefits it’s not hard to see why!

Let’s kick things off with Turmeric…

The Health Benefits of Turmeric:

the-ultimate-guide-to-growing-turmeric-and-giner-plus-why-you-should-turmeric

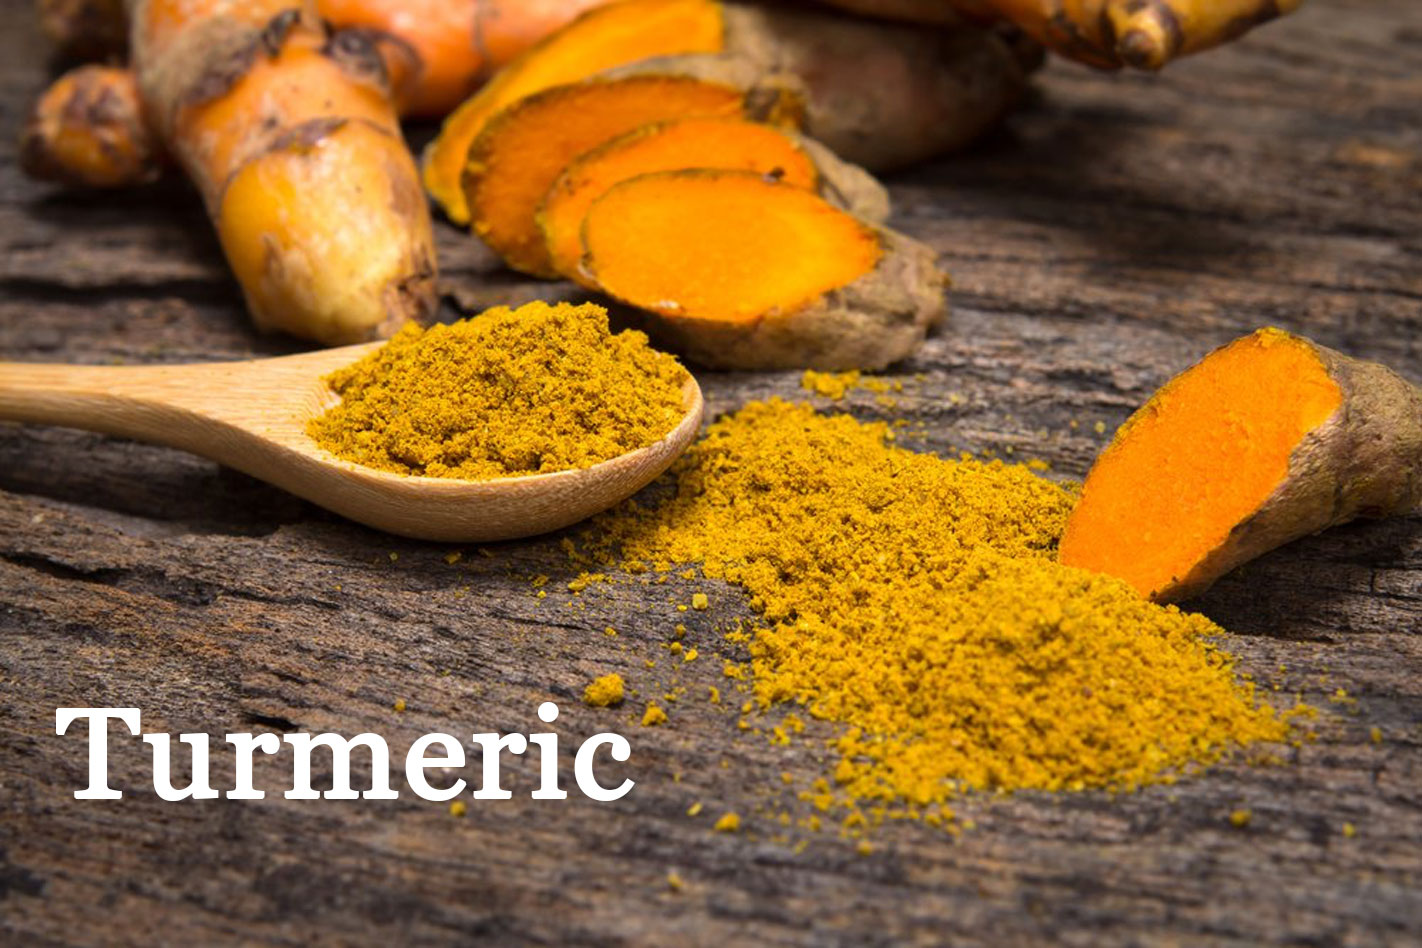
The little spice that gives curry its yellow colour (& your t-shirt a nice big stain) could potentially be one of the most powerful medicinal herbs in the world.

In many cases it’s been shown to be more effective than certain anti-inflammatories, anti depressants, blood thinners, diabetes drugs, arthritis drugs, steroids, cholesterol medication & chemotherapy drugs.

Here are a few more amazing things you might not know about turmeric:

  • It’s been shown to reduce inflammation better than drugs administered to people with rheumatoid arthritis, bringing them more relief from the condition. Chronic inflammation is the root of all disease today.
  • It’s incredibly effective at reversing insulin resistance (insulin is a hormone produced by the pancreas that remove glucose aka sugar from your blood as too much sugar in your blood can be toxic) & lowering blood sugar, especially important for people suffering from type 2 diabetes.
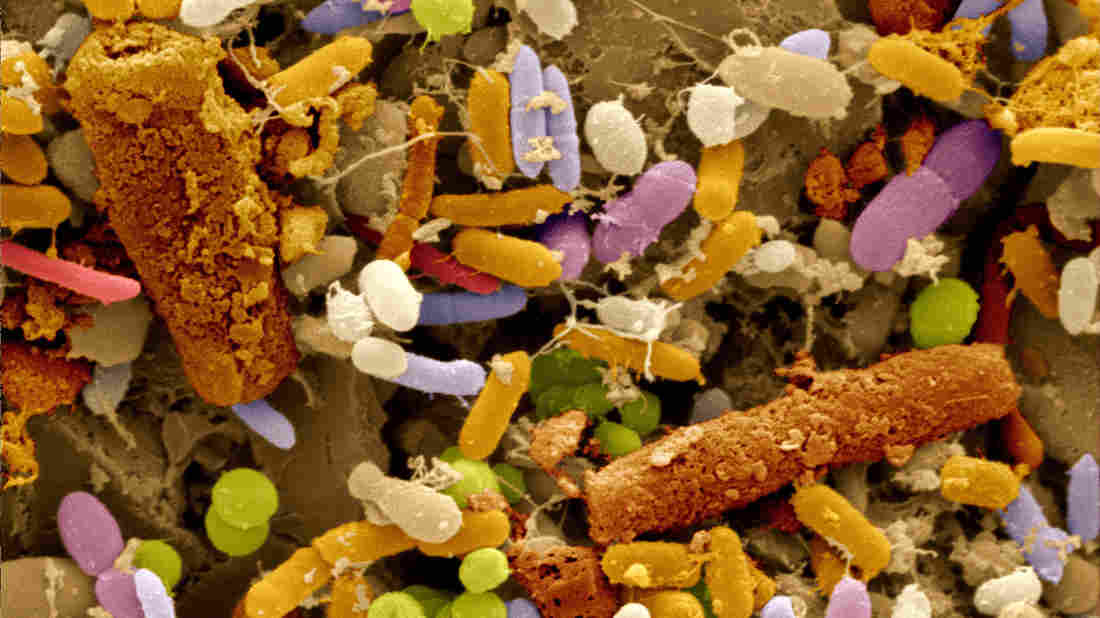
  • It provides relief from Inflammatory bowel disease, Crohn’s disease & other serious gastrointestinal issues, without the negative side effects experienced by the drugs given to treat such conditions. It also helps to rebuild the good gut bacteria!
  • According to the Cancer Research UK – Turmeric has been shown to be able to kill cancer cells & even prevent more from growing, especially in the case of breast, bowel, stomach & skin cancer.
  • It’s used as a potent painkiller, even against things like burns on the skin.
  • It increases cognitive function & improves memory.

Pretty impressive hey?

Hard to believe this one plant can have so much power over your health… but it absolutely does – all the more reason to grow it yourself!

It’s also worth mentioning, the compound responsible for all these amazing benefits is called ‘Curcumin’.

Now you may have already heard of curcumin… but whenever you hear someone talk about the effects of turmeric, they’re really talking about the effects the curcumin found in turmeric. 😉

A final word on curcumin & turmeric – as beneficial as it is, your body sees it as a foreign substance, which basically means it sees it as something that doesn’t belong in your body & needs to get rid of it as soon as you consume it. Black pepper contains the compound piperine, which increases the bioavailability of curcumin by up to 2000% – so mixing some black pepper with turmeric can be a good way to reap even more benefits.

Now let’s take a look at Ginger.

The Health Benefits of Ginger:

the-ultimate-guide-to-growing-ginger-and-turmeric-plus-why-you-should-ginger

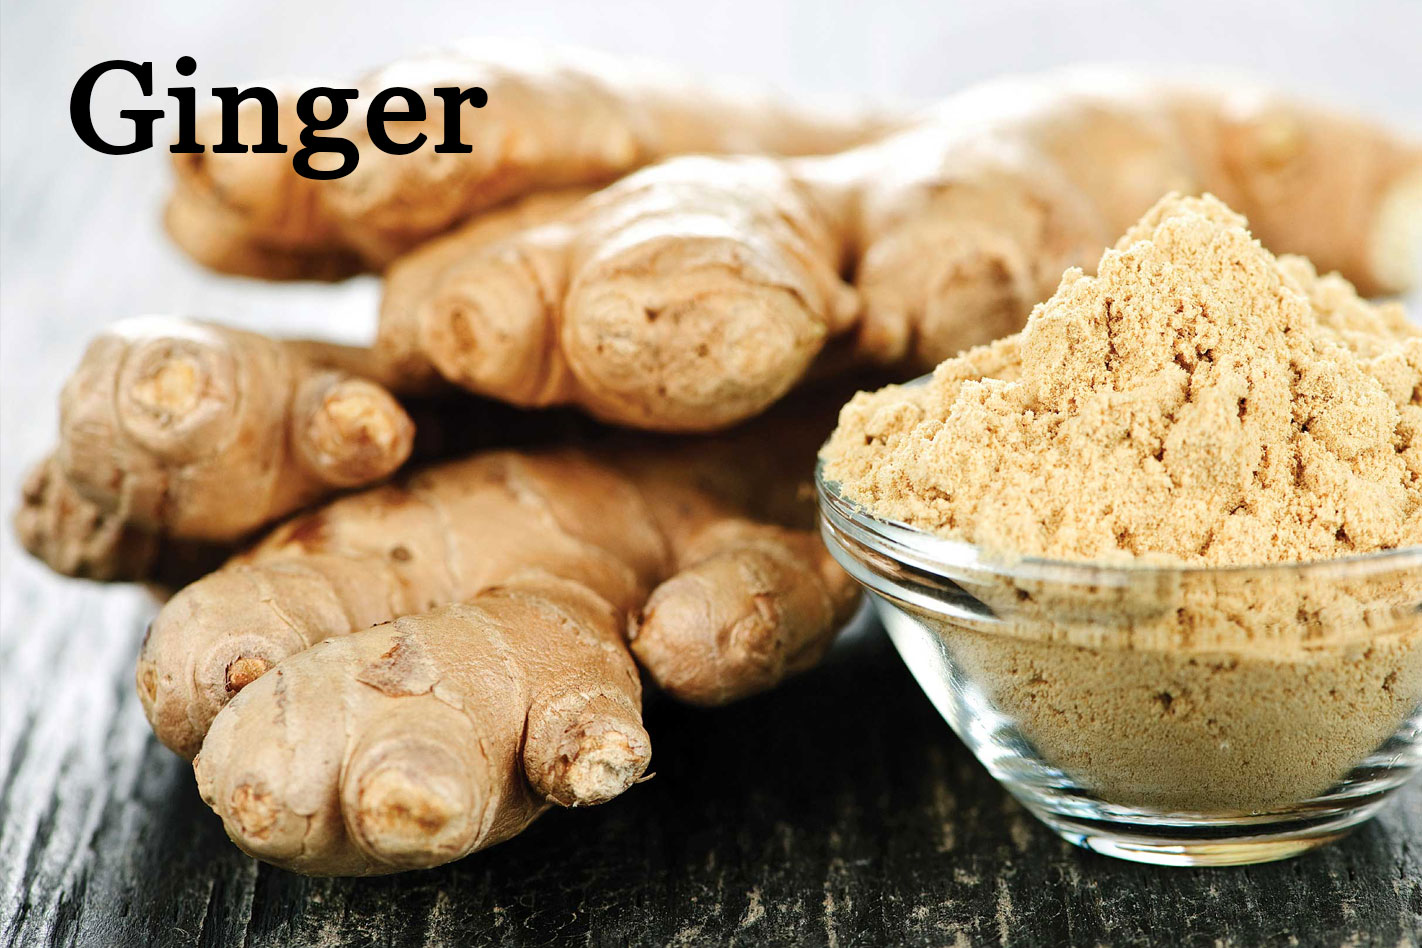
Ginger is another stud among plants, it’s closely related to turmeric & just like its cousin, Ginger contains a particularly powerful ingredient similar to curcumin called ‘Gingerol’.

Gingerol is responsible for many of the benefits that come from consuming ginger. Speaking of… here a few incredible things that Ginger can do for you:

  • It helps your body to get the most out of your food by helping to maintain healthy digestion & improving nutrient absorption.
  • Provides relief from stomach issues like indigestion, nausea & even stomach ulcers.
  • Promotes a healthy, strong immune system which is crucial for overall health.
  • Protects your body from bacterial & fungal infections.
  • It provides effective pain relief & strong anti inflammatory properties.
  •  It helps increase insulin sensitivity & can have a huge impact on blood sugar levels which is important for keeping diabetes at bay.
  • It has been shown to be effective in stopping the growth of cancer cells.

What did I tell you? Ginger packs a real punch of healing goodness!

Okay… now to the fun bit! Let’s talk about how to grow these bad boys!

How to Grow

FYI – The same planting rules apply to both turmeric & ginger unless otherwise stated 😉

Now first off, turmeric & ginger are usually Tropical/Subtropical plants as they THRIVE in the heat… HOWEVER, you absolutely CAN grow them in a temperate climate as well (we’re over here in rainy-cloudy-yucky Melbourne!)

The best time to plant your turmeric & ginger is in Spring time once your soil is nice & warm – October is ideal.

Unlike the edibles you might be used to growing, turmeric & ginger don’t grow from a seed – They grow from a rhizome.

Ever purchased fresh Ginger or Turmeric from the shops or famers market before? – That’s a Rhizome! 😉

your-ultimate-guide-to-growing-turmeric-and-ginger-plus-why-you-should-turmeric-and-ginger-rhizome

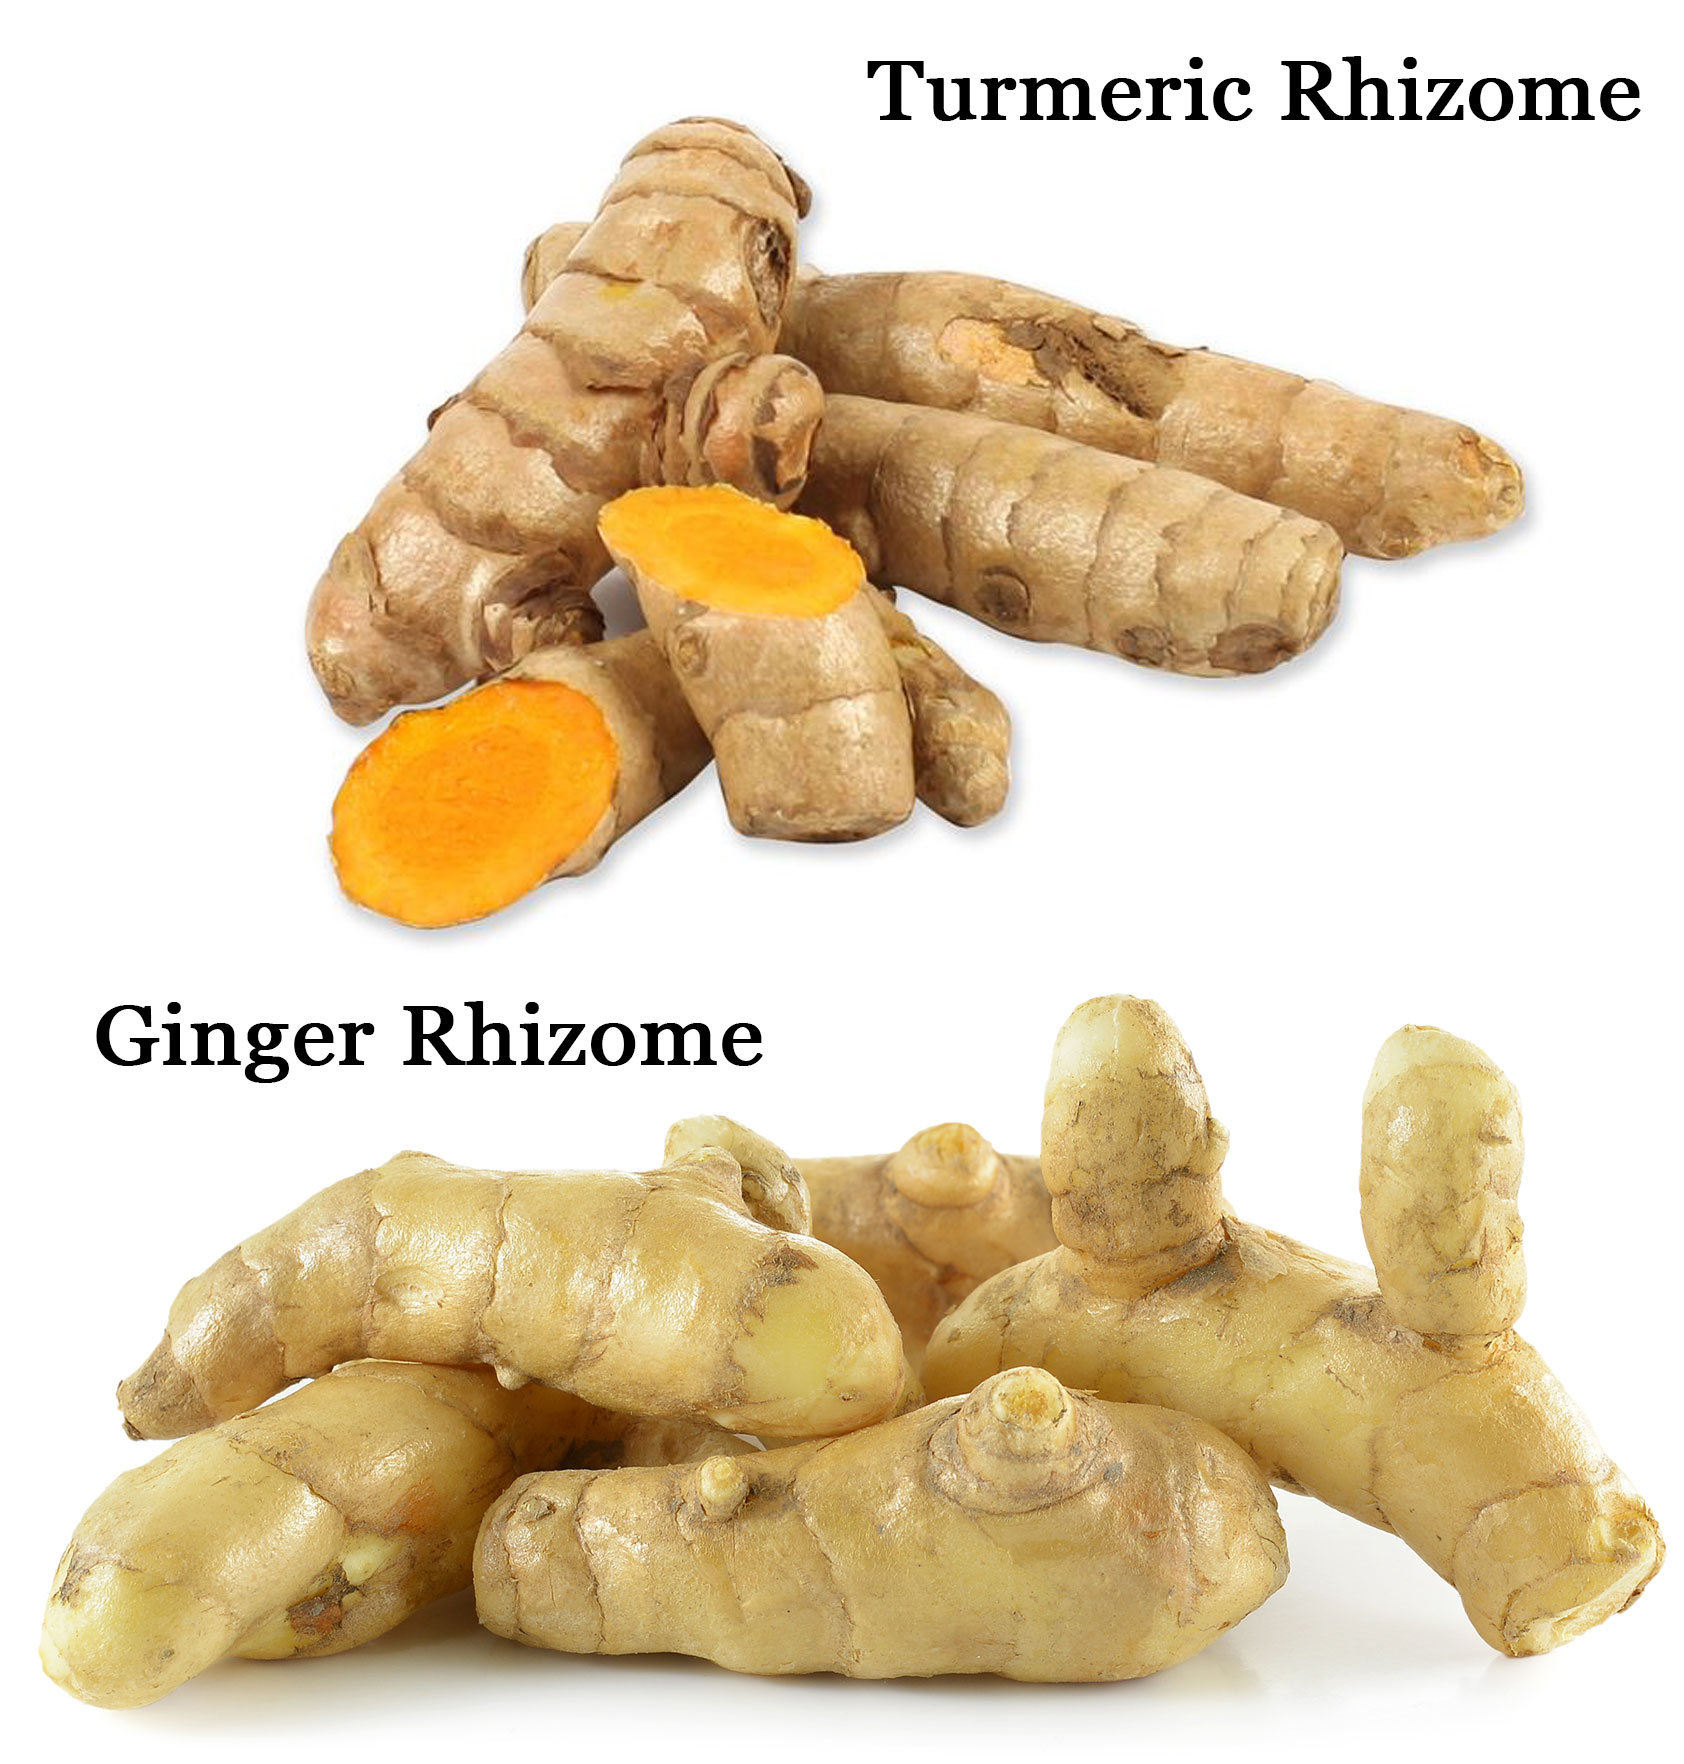
You can either purchase your rhizomes from a nursery OR just purchase them from your local organic foodstore/farmers market.

If you’re going to purchase it from the supermarket… always always ALWAYS make sure your purchase organic! As conventional turmeric/ginger is often sprayed with a growth retardant to keep it from sprouting while it sits on the shelf.

If you purchased large rhizomes you can break them up into thumb like pieces (the size of a big mans thumb…not Crystal’s thumb!).

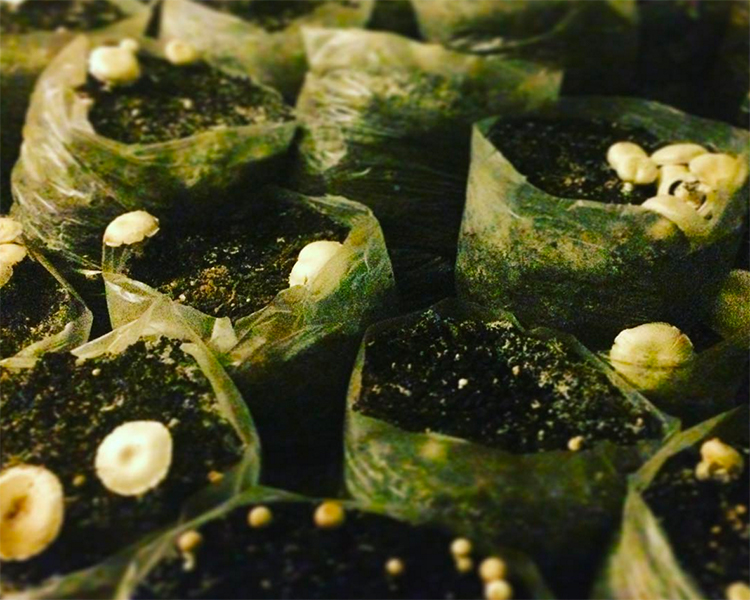
Now before you plant them out, you will need to wait until they develop little eyes/buds on them. You should have at least 2 eyes/buds on each rhizome before you plant them out. If they don’t already have them just pop the rhizomes into the cupboard until they appear.

the-ultimate-guide-to-growing-turmeric-and-ginger-plus-why-you-should

Also, if you are going to break your rhizome up because it is quite large, wait until the broken skin has dried out before planting – this should stop any possible fungus problems – we don’t want fungus!

Alrighty – now the fun is really starting!

Once your rhizomes are ready to rock, all you need to do is plant them 5-10cm deep into the soil (literally just push them into the soil & then cover them up with the soil) & make sure the buds are FACING UP! (The buds will sprout & turn into a plant which comes through the soil). If your planting multiple you can plant them about 20-30cms apart.

You want to plant your rhizomes in a warm BUT lightly shaded spot. They can survive in a full sun position but they prefer a light shade!

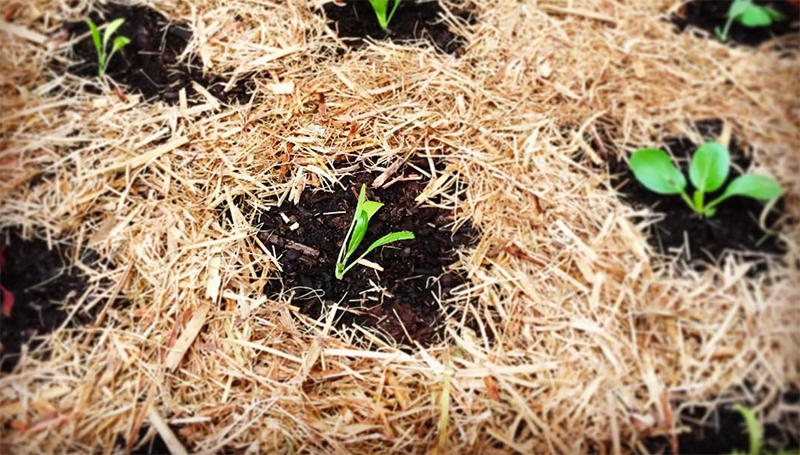
Now water as you would do your other plants (you want the soil to remain moist) & you will eventually see a plant pop up 🙂

the-ultimate-guide-to-growing-turmeric-and-ginger-plus-why-you-should-turmeric-plants
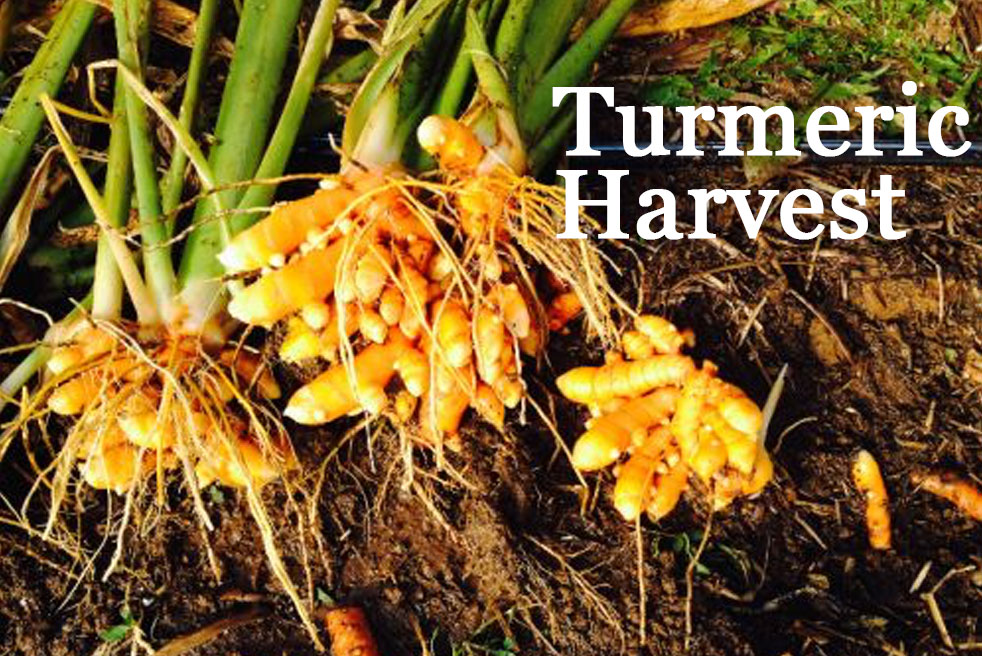
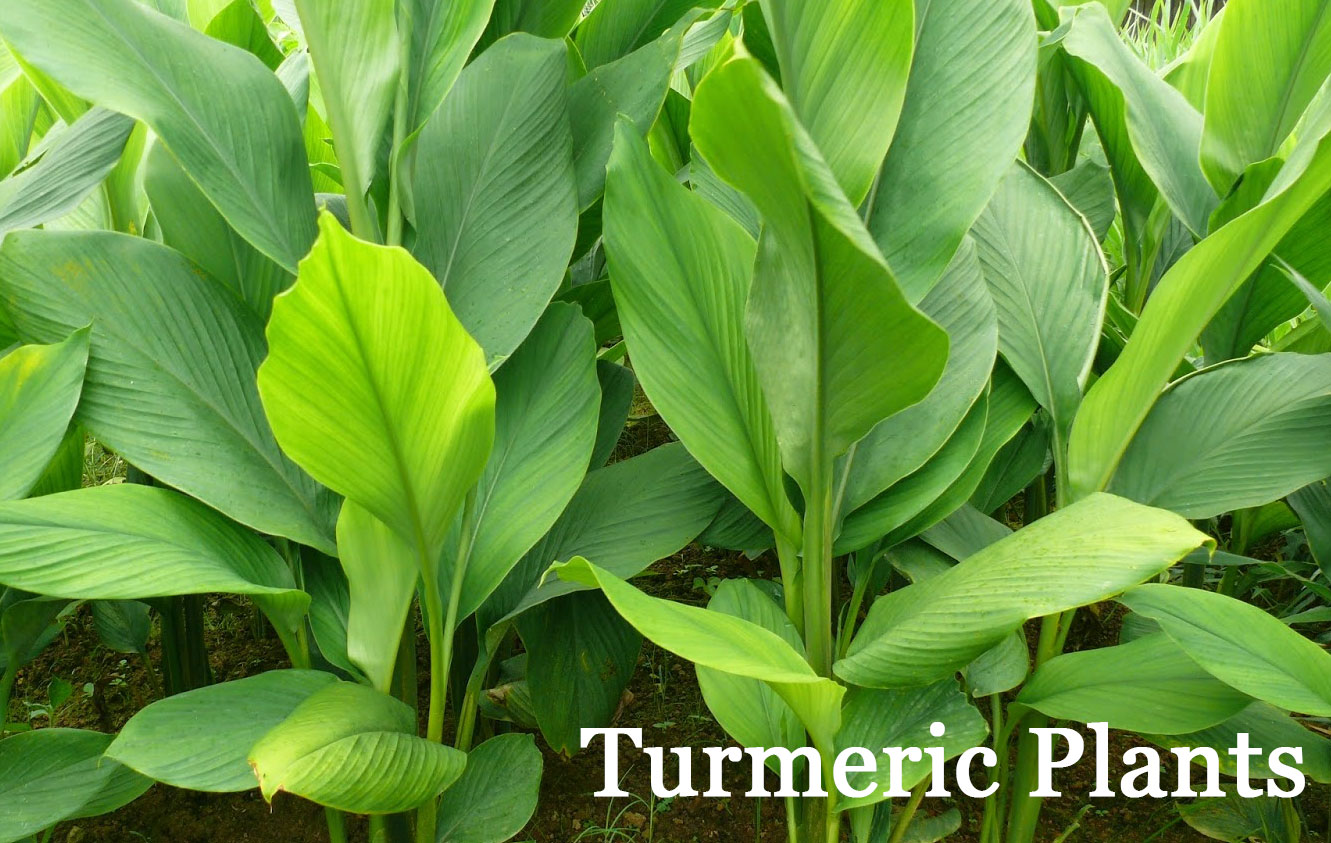
Ginger & turmeric plants grow quite tall & in about 8-10 months (8 months for ginger, 10 months for turmeric) when the leaves have turned yellow (or have died completely) it’s time to harvest your goods!!!

Now I know what you might be thinking… 8-10 months to harvest… really??? But trust us – the harvest is well & truly worth it 🙂

the-ultimate-guide-to-growing-turmeric-and-giner-plus-why-you-should

Reminders & FYIs…
  • Never plant into cold wet soil!
  • Never plant them in winter!
  • For cooler areas you can plant them in pots (instead of the veggie patch) & keep them indoors.

And that’s a wrap! Hopefully this post inspires you to grow one (or two) edibles you’ve never tried growing before.

The positive health benefits brought on by these two incredible little herbs are truly powerful & rival many medicines of today – minus any of the nasty side effects!

Another awesome little thing to factor in is the amount of money you’ll save on buying organic ginger & turmeric… because hey… that stuff ain’t cheap!

Any Q’s, let us know in the comments below – we’d love to hear from you!

A & C xo

Paleo Double Chocolate Blueberry Cheesecake

Although we gave refined sugar the boot many many moons ago & our diet is very low in natural sugars… We’re quite aware that all celebrations call for cake (we hope you are too!!!)

So what are we celebrating?

THP’s 6 Month anniversary!

What an AMAZING 6 months it has been!!

What an AMAZING company The Healthy Patch is growing into (get it… growing?)…

& lastly… what an AMAZING cake we get to celebrate with! 😉

One of our favourite ways to celebrate is of course with beautiful food (especially cake) – but remember – just because you’re celebrating or eating cake, doesn’t mean you can’t pack your food with nutrition!

As one of our favourite sayings goes – Every Time You Eat Is An Opportunity To Nourish Your Body. 

And we firmly believe this should apply to every meal!

paleo-double-chocolate-and-blueberry-cheesecake-4

So let’s take a look at some of the rock star ingredients shall we 🙂

Blueberries – Packed with beneficial plant compounds that provide protection from free radical damage, as well as containing a number of other essential minerals

Cacao – The highest food source of magnesium available, everything is better with cacao

Coconut Cream – Could source MCT (medium Chin triglycerides) a fatty acid that’s absorbed in a unique way to other fatty acids makes it available to be used as energy by the body quicker.

Cashews – Cashews are packed with iron, selenium, magnesium, phosphorus, zinc & also contain phytochemicals, antioxidants & protein.

Manuka Honey – Manuka Honey has an incredible nutritional profile & strong antibacterial properties.

Mesquite – Contains a number of vitamins, minerals & protein.

Ready for the recipe?

paleo-double-chocolate-and-blueberry-cheesecake-2


Paleo Double Chocolate Blueberry Cheesecake

Ingredients

Base:

1 cup almond meal or LSA

1/4 cup cacao

1 tbsp. mesquite powder

½ tsp. cinnamon

½ tsp. bee pollen (optional)

1 tbsp. manuka honey

2 tbsp. coconut oil, melted or soft

Filling:

400 ml coconut cream (1 can)*

1 cup cashews, soaked in water overnight, drained

1 tbsp. manuka honey

1/4 cup cacao

1/2 tbsp. cinnamon

Blueberry Cream (top layer):

1/4 cup cashew, soaked in water overnight, drained

1/2 cup coconut cream

1/4 tsp. vanilla bean powder

1 tsp. manuka honey

1/4 cup blueberries

* Make sure to find a good brand of Coconut Cream that doesn’t contain anything other than Coconut – we love OnRich Organic Coconut Cream

Method:

Base:

Load up all the ingredients into a food processor & mix until you’re left with basically crumbs, you want to be able to form the mixture into a ball easily & if you have any trouble keeping the mixture together just add more coconut oil.

Take an 18cm loose base cake tin, add the mixture & firmly press it down until smooth & even. Chill for at least 30 mins before adding the filling.

Filling:

Add all the ingredients for the filling to a high speed blender (we use a vitamix) & blend on high until smooth. Once it’s done pour it straight onto the base & leave to firm in the fridge overnight (or for at least 4 hours if you’re having it that day)

Blueberry Cream (top layer):

Put the blueberries to one side for now, take the rest of the ingredients, add it to a high speed blender & blend until smooth. Now add the blueberries & blend for another 30 seconds. Pour into the cake tin (on top of the chocolate filling) & pop it back into the fridge to firm up (1-2 hours)

Garnish with blueberries & have a freaking ball eating your cake 🙂

A & C x

IncrEdible Spotlight – Mustard Greens

The awesome thing about growing your own edibles is that you open yourself up to a whole new world of incredible plants that you’re certain you never saw on the shelf of woolies!

Those ‘Superfoods’ you thought you had a handle on are just the tip of the iceberg – & speaking of iceberg – old mate lettuce is becoming more & more uninteresting by the mouthful!

So today – & in fact – for the life of our brand-spanking-new segment, we want to give you a taste (get it?) of the edible world & introduce you to some of the more uncommon, yet super-powerful-body-loving-nutrient-packed plants that you can start growing!

We are SUPER excitied to welcome you to our latest segment…

IncrEdible Spotlights

Packed full with their amazing health benefits, how it works in your body + how & when to grow them – we know you will love it!

Alright, we can barely hold in our excitement anymore!

Ready for our very first Incredible Edible Spotlight?

Da da da da….


MUSTARD GREENS!

Mustard Greens are one of our FAVOURITE leafy greens to grow, they taste GREAT & they are packed to the brim with nutrition!

The health benefits of this peppery little cruciferous are immense – from skin issues, to hair problems, to bone density, to helping to cleanse your body of unwanted heavy metals – mustard greens are a must – & the punch line is many people have never even heard of them!

As I mentioned before, mustard green are a member of the cruciferous vegetable family, so they’re cousins of other awesome edibles like kale, broccoli & cauliflower.

There are many different types of mustard green, each varying in shape & colour.

Some (like the name suggests) are green… while others have tinges of red or even purple (known as Osaka Purple Leaved – the type we grow!) 

They make a great addition to salads, juices, smoothies, soups, nori rolls… in fact – just think “would kale work in this dish?” –  If the answer is yes then you’re good to go!

Mustard Greens are packed to the brim with fiber, vitamins, minerals, antioxidants & phytonutrients & the list of benefits it provides & condition it can protect you from in truly mind blowing! (Trust me, if you aren’t already eaten this stuff by the bowlful – you will be soon!)

Reasons why we LOVE Mustard Greens: 

  • They’re great for clear & firm skin!
    Mustard greens are particulary high in Vitamin A & C which are both super important for healthy skin – Vitamin A assists with wound healing +  fighting acne while Vitamin C is needed to produce collagen which your body uses to produce new healthy skin cells.
  • They’re awesome for Bone Density
    They also contain an awesome amount of Vitamin which is a MUST HAVE for maintaining a strong, healthy bone structure (move over calcium!)
    In fact, even if you’re getting the adequate levels of calcium… without sufficient levels of vitamin K your body won’t be able to absorb it properly!
  • They help clear your body of heavy metals
    You come into contact with things everyday that cause heavy metals to accumulate inside your body, even things like cookware, food containers & even certain foods!
    Overtime these substances can be seriously damaging to your health. Mustard greens can actually help your body to clear out the harmful heavy metals from deep inside your body!
  • They also feed your gut microbes!
    Keeping your gut microbes healthy & happy is vital for thriving health… poor gut health can lead to a whole host of issues… at the very least you will struggle to absorb nutrients from the food you are eating, putting you at risk of even more health issues!
    One thing your gut microbes (gut flora) thrive on is fibre, so having a good amount of dietary fibre in your diet is super important – Now guess what a great source of fibre is…yep! Mustard Greens!
  • And they also contain cancer fighting compounds
    Just like it’s big cuzzy Kale, mustard greens contain a compound called Glucosinolates (studies have shown Mustard Greens have very high levels of it) which are converted into Isothiocyanates in the body. Isothiocyanates have anti cancer properties & can be helpful in the prevention of cancer.

How To Grow Mustard Greens  

    • When to grow:
      All in all mustard greens are pretty relaxed about what month they’re grown in – however they DON’T like the super-hot weather or a mighty-cold frost.
      Technically they are a cooler crop… but providing you have good quality, nutritious soil – you shouldn’t have any trouble growing them in most parts of the year if you’re in a temperate zone.
      When grown in the cooler months their taste will be slightly sweeter!
    • Harvest Time:
      Mustard Greens are quick growers & you can expect to start harvesting in 6-8 weeks – Harvest your mustard greens by snapping of the outer (older) leaves first.

    • Plant with:
      Plant Mustard Greens alongside Pansies, beets, celery, cucumber & marigolds to see a real BOOM

    • Don’t plant with:
      Strawberries, tomatoes, capsicums or eggplants – they don’t get along!!


And on that note – I’m off to harvest some mustard greens 😉

Any Q’s – hit me up in the comments below!

Anth

Paleo Superfood Bread

Ah bread… what can I say?

I love it…

I bet you love it too – maybe as much as I do…

Just like my love for pasta, my infatuation with bread is much the same.

But, when I started on my path to good health – making sure I was only giving my body the most nourishing wholefoods… there went my bread.

Recipe, after recipe, after recipe, after recipe of bread has been created in this kitchen.

And although they all tasted pretty damn good (especially my Gluten Free Sourdough!), this is the only one that I LOVE eating everyday  -snack or meal… it rocks my socks!

WHY?

Taste aside (we will get to taste in a minute) – it’s the ingredients in it that has me coming back for more & more each day!

Even though my other bread creations were made with ‘clean’ ingredients, the problem was that they all called for a lot of the same ingredient… & even though they weren’t bad for me, they weren’t providing me with as much nutritional value as I wanted them to.

Remember – a colourful array of different wholefoods always beats a heap of the same ingredient (unless it’s greens – you can go NUTS on greens!)

This is the only bread that I have made thus far where I can feel it nourishing me from the inside out & its nutritional content is through the roof. It’s the only bread that I feel comfortable eating everyday.

LET’S TALK ABOUT WHY IT’S AMAZING SHALL WE?

Okay – I’ll give you a rundown of the ingredients + the amazing benefits behind it – because, they are seriously amazing…

  • LSA – A mixture of ground up Linseed, Sunflower Seed & Almonds  – LSA is a great source of protein, essential minerals, fatty acids & fibre – You can also add it to your smoothies or salads!
  • HEMP SEEDS – One of our favourite foods by far – Hemp seeds are an amazing source of healthy fats, rich in multiple vitamins & minerals, & most importantly – are a complete source of protein as they contain ALL of the amino acids!
  • PSYLLIUM HUSK – A source of water soluble fibre, Psyllium husk promotes healthy gut flora, can help keep your skin clear by forcing toxins out of the body before it has a chance to be excreted out through the skin. It can also help regulate blood sugar levels.
  • SPIRULINA – An awesome superfood that can clear heavy metals from the body, is rich in vitamins & minerals, has anti microbial, anti cancer AND anti inflammatory properties – Another source of complete protein, Spirulina is a must have for every kitchen (although we don’t recommend eating it on it’s own)
  • MESQUITE POWDER – Mesquite powder is rich in minerals including calcium, magnesium & zinc, high in dietary fibre & it has a sweet caramel like flavour.
  • MACA POWDER – Maca powder helps to boost the immune system, balance hormones, increases fertility in both men & women, helps the body adapt to stress & is a great source of amino acids, fatty acids, vitamins & minerals – Maca rocks!
  • GELATIN POWDER – Gelatin is derived from collagen & is an amazing source of amino acids, it does wonders for your gut, joints & skin health.
  • SPINACH – High in folate which is important during early pregnancy as well as a number of other processes within the body – magnesium which is important for over 300 biochemical processes including energy production & DNA repair – It helps prevent inflammation & is good source of multiple vitamins.
  • CARROT – High in beta carotene which has antioxidant properties & also helps the production of Vitamin A which is important for healthy eye sight & immune function.
  • ZUCCHINI – Zucchini is a good source of Vitamin C & the phytonutrients ‘lutein’ & ‘zeaxanthin’ which promotes good eyesight. Zucchini also contains & a number of other vitamins & minerals.
  • EGG – WE LOVE EGGS! A little bundle of fat & protein, eggs are actually a source of complete protein, high in iron & biotin which helps maintain skin, nail  & hair health
  • COCONUT OIL – Pretty much the only oil any one should cook with – coconut oil is an amazing source of MCT’s (medium chain triglycerides) – a fatty acid that gets metabolised differently to other forms of fatty acids & is made available to be used as energy much quicker. It’s the healthiest source of good saturated fats you can possibly get, helps to speed up your metabolism & has an incredibly high smoke point. If you’re not on the organic coconut oil train yet, get on it!

LET’S TALK ABOUT TASTE BABY!

It’s delicious – we absolutely love it.

Anthony calls it cake bread.

I think that sums it up!

This bread is moist, dense, & it feels & looks like green cake.

The spirulina (which quite honestly, I cannot usually stomach unless it is disguised with a billion other nice-tasting foods) somehow manages to give it a really nice flavour.

We top the bread with our ABC nut butter & that really is the icing on top – they go together SO WELL –  so PLEASE PLEASE PLEASE try it with nut butter – you won’t regret it 😉

Okay – shall we get to the recipe then?

PALEO SUPERFOOD BREAD


Ingredients 

DRY INGREDIENTS

  • 1 Cup LSA
  • 1 Cup Hemp Seeds
  • 1/2 Cup Pysllium Husk
  • 1/2 Cup Chia Seeds
  • 1/2 Cup Spirulina
  • 1/4 Cup Mesquite Powder
  • 1/4 Cup Maca Powder
  • 1/4 Cup Gelatin Powder (optional)

WET INGREDIENTS

  • 1 Cup Spinach
  • 1 Large Carrot, Grated
  • 1 Large Zucchini, Grated
  • 1 Egg
  • 2 Tbsp Coconut Oil

BAKE WARE

1 Silicon Bread Loaf Pan ($5.00 from Kmart!)

Method 

  1. Preheat oven to 175°C
  2. In a food processor, process ALL dry ingredients until combined & a dark green crumb forms.
  3. Add ALL wet ingredients & process again until a moist, almost wet ball of mixture forms.
  4. Flatten ball out in your Silicon Bread Loaf Pan & form a loaf like shape by pushing the sides of the Silicon Loaf Pan in against the mixture,
  5. Place in oven and bake for 1 hour
  6. Carefully place loaf upside down in the Silicon Bread Loaf Pan & bake for another 15 minutes (so it cooks the whole way through).
  7. Cool on bread rack & DO NOT slice bread until completely cool (or it might break apart).
  8. Store in the fridge

Notes 

  • If you get home late & you can’t stay up an extra hour for the bread to bake, just whip up the bread mixture & refrigerate over night. Bake bread in the oven first thing in the morning.
  • If you end up refrigerating the mixture the night before, you can dismiss step 6 😉 (forgo flipping & baking for an additional 15 minutes)
  • If 1/2 Cup of Spirulina is to strong for you, just start with 1/4 Cup and work your way up
  • Have a favourite Superfood? Add it to this recipe! OR just use this recipe as a base to create your favourite bread!

I hope you love this bread, & if you don’t then at least try to because it’s so damn good for you 😉 (But I think you will love it!)

Have an awesome time making it & any Qs please let me know!

C xxx


ZINC – symptoms of low levels + why your body needs it to THRIVE!

In case you’ve missed it – we’re pretty big fans of minerals, they’re crucial for SO many essential functions within the body – but it can be difficult to know exactly which minerals you really need to perform at your best

…Cue in our Mineral Highlights!

And today we are talking about the especially-wonderful ZINC!

To put it simply… Zinc is one of those minerals that you DON’T want to be deficient in…

Why? Because it is responsible for so many functions in your body! (Including the ones that make you look a million bucks 😉 )

Not only is it essential for the activation of literally HUNDREDS of enzymes that are super important for awesome digestion (good digestion is crucial for you to be able to absorb nutrients)…

It’s also responsible for the following…

  • Wound Healing including the prevention of the formation of scars (so important for stretch marks!)
  • Strong Hair (zinc nourishes your scalp)
  • Clear Skin (zinc controls oil production in your skin)
  • Nail Growth
  • Taste & Smell
  • Good Vision
  • A Strong Immune System
  • Maintains Male Reproductive Health

What did I say… You don’t wan’t to be deficient in Zinc 😉

Symptoms which can be linked to low amounts of ZINC in your body:

  • Getting Sick with a cold/flu on a regular basis
  • White Specks in the nails
  • Dry & Brittle Hair
  • Hair Loss
  • Dandruff
  • SLOW healing wounds/purple marks on the skin post acne
  • Lack of taste
  • Loss of appetite

So HOW do we NOT be Zinc deficient?

Because our bodies cannot make Zinc, we need to get it from food sources.

Food Sources HIGH in ZINC…

  • Sesame Seeds & Pumpkin Seeds (remember to activate your seeds & nuts!
  • Tahini (Sesame Seed Spread)
  • Leafy Greens (especially Spinach)
  • Asparagus
  • Cashews
  • Almonds
  • Organic Grass fed beef
  • Oysters
  • Beans & Lentils 

zinc-deficiency-2
zinc-deficiency

But before you run out to woolies and stuff your basket full of seeds & spinach – it’s important to remember where the food sources get their Zinc from…

We will give you a hint…

It’s the soil.

If the soil doesn’t have adequate amounts of Zinc – neither will your food sources!

And as you have most likely heard us talk about… 100 years ago or so the world’s soil was a rich source of minerals…but unfortunately these days (due to harsh fertilisers, chemicals & modern practices like deforestation) our soil is EXTREMELY depleted (learn more about that here)…. Hence the reason that many people in our Western World suffer from a Zinc deficiency.
For this reason we whole heartedly recommend you grow your own SUPER CHARGED food (packing the soil with extra minerals & nutrients) to make sure you are getting enough of this legendary little mineral (and all the others!).

If you are buying your produce, go for only ORGANIC as much as possible – but our first preference is always to grow your own!

If you think that your Zinc levels might be considerably low (you can get this tested via a naturopath), you can take a Zinc supplement until your food sources are providing you with enough of the goods.

A great Zinc supplement that we recommend is Thorne Research, Double Strength Zinc Picolinate. (Please consult your health professional before starting a new supplement)

It’s extremely important to remember that supplements SHOULD NOT replace an amazing diet, and should not be used long term. Use until you are getting enough from food sources and then stop.

Any Q’s, shoot them down below – always love hearing from you!

Anth

Paleo Creamy Pumpkin Pasta


Creamy pumpkin pasta – my weakness.

Whenever we would go out to dinner, that would be the first thing my eyes would scan the menu for.

Scoffing down mouthfuls of creamy deliciousness – at that very moment I thought food couldn’t get much better…

My body most certainly didn’t agree with me though!

Another headache, another bloated stomach, another throat infection.

When I made the switch to Organic Wholefoods I really thought my old accomplice was irreplaceable – surely that has to be it for me & my creamy pastas… unless of course I come up with some kind of substitute that tastes half as good as the real deal…

Dearrrrr me was I wrong!!

As I make my 3rd year into Organic Wholefoods – minus any refined sugar, gluten or cows dairy, I pick up more & more inspiration on how to use these beautiful foods, how to make them pop, how to make them extra-nourishing, and more than anything – how to make them absolutely delicious!

My Paleo Creamy Pumpkin Pasta is not only a beautiful, nourishing, winter favourite of mine – it also tastes JUST as good as any creamy pasta made with dairy cream.

The dish is made nearly entirely out of veggies & herbs (with the exception of the 3 C’s – coconut, cashews & chicken, each bringing their own nutritional goodness to the table) & is such a beautiful example of some of the nourishing dishes that we can make using purely wholefoods.

Some notes before we get started:

  • The pumpkin has been chopped up with seeds & all
  • The pasta has been made from zucchini’s with our spiraliser (if you don’t have a spiraliser please invest in one – they are around $30-$40 & they are worth every penny!!)
  • The creamy sauce has easily been made by throwing all of the sauce ingredients into our vitamix!


On to the recipe…

Paleo Creamy Pumpkin Pasta

– Serves 2 with leftovers for lunch


Ingredients 

Pasta
1 x large zucchini (or 2 small ones)

Cream Sauce
1 x 400gm can of coconut cream
2 x small red chilies
1/2 cup cashews soaked overnight in water
1 large garlic clove
Small handful of fresh rosemary
4 good twists of himalayan pink salt
8 good twists of peppercorns

Everything Else
3 spring onions – chopped up
1 large garlic clove, minced
2 1/2 cups pumpkin, diced
2 cups mushrooms, leave whole
1 cup capsicum, diced (red or green)
2 chicken breasts, diced (or just use leftover Roast Chicken)
1 cup (packed in) of baby spinach
1/4 cup pumpkin seeds
1 tsp. coconut oil for cooking
Olive Oil for drizzling

Method

  • Preheat oven to 180C and roast pumpkin for 25 minutes.
  • Whilst pumpkin is roasting, peel your zucchini & spiralise it using a spiralising tool (we use the Baccarat Pete Evans Spiraliser).
  • Place a pan on medium heat & add coconut oil.
  • Sauté spring onion & garlic for a few minutes & then add diced chicken.
  • Cook until chicken is just undercooked & add mushrooms, capsicum & zucchini pasta.
  • Leave to cook a little longer whilst you make the sauce.
  • Put all ingredients for your sauce into a highspeed blender (we use our vitamix) and blend on high until smooth & creamy.
  • Remove roast pumpkin from oven and add to the pan with your pasta.
  • Add Sauce & baby spinach to pan.
  • Toss all ingredients so everything is nicely covered with the sauce and leave to cook for a few more minutes so your sauce heats up & your spinach wilts.
  • Lastly – add pumpkin seeds & toss again.
  • Serve up in beautiful bowls and drizzle olive oil over the top.
  • Enjoy your pasta!

Of course, any questions at all – please let me know – & if you come up with any beautiful alternatives I would love to hear about it in the comments below!

C xxx

A Non Negotiable For a Thriving Gut + Edible Garden!

You’d be forgiven for thinking that your gut & the soil your veggies grow in are about as much alike as a raven & a writing desk…

But the truth is they share a lot more in common than you most likely realise!

What the?

Yep – for real! There is one thing that is absolutely essential for a thriving gut…

& an edible garden – & without it, your plants & your health will suffer…

Ready for it?

Drum roll please…

…….

MICROBES!

Let’s Talk About Gut Microbes…

Gut Microbes are also known as gut flora or microflora – & just incase you didn’t guess it – they are teeny tiny organisms that live inside your gut (& I mean really tiny – you’ve got about 100 trillion of them living inside you right now – hence the name “MICRObes” Because you can only see them under a Microscope!).

They’re made up of many different species of bacteria & vary widely from person to person.

But don’t let the size of these little guys fool you – they are INCREDIBLY important.

And as you may well have heard – encouraging the number of good bacteria & keeping them happy & healthy is an integral part of good health.

So what do they do??

They not only break down the food you eat & make the nutrients readily available for you to absorb (as important as that is!) – but they also protect you from a whole host of health issues, from simple bloating & diarrhoea, to candida – all the way to more serious health conditions including:

– diabetes 

– chronic fatigue syndrome

– inflammatory bowel syndrome

– rheumatoid arthritis 

…. & the list goes on & on!

It really is remarkable the amount of influence the health of your gut has on your overall wellness – & perhaps even more remarkable still is the power you have over the health of your gut microbes with the foods you choose to eat!

Organic fermented veggies, bone broth & turmeric are among the kind of foods that promote a strong healthy gut flora, while pesticide riddled conventional produce, sugar, processed/refined foods & caffeine promote an unhealthy, compromised gut flora & should be avoided!

a-non-negotiable-for-a-thriving-gut-and-your-edible-garden

In fact, more & more people are becoming aware of the importance of gut health, & putting more time, money & effort into it – eating fermented foods, taking probiotics, drinking kombucha etc…

BUT THEN…  

We sit there scratching our heads, wondering why our edible garden doesn’t look like the pretty little garden pictured below (our beautiful friend, Adele McConnel’s Healthy Patch) when we’re planting it in a lifeless soil, or we’ve used chemicals and harsh fertilisers to get rid of the annoying bugs…

A-non-negotiable-for-a-thriving-gut-and-edible-garden


…Queue In Soil Microbes… 

You see, just like a healthy gut, healthy soil should ALSO be home to a vibrant ecosystem of microbes – 10,000,000 per gram of soil to be exact…

And just like they work in your gut – their job is to break down the nutrient rich organic matter in the soil & help make the nutrients available for the plants to then uptake through their routes (which then gets passed on to you).

They also protect the plants from any nasty bugs found in the soil!

I think everyone knows these days that taking antibiotics is incredibly damaging to the microbes in your gut – wiping out huge numbers of the good & bad bugs – & making it incredibly difficult for your body to absorb nutrients from your food (& opening you up to all kinds of illnesses).

But what many people don’t realise however, it that using pesticides or harsh fertilisers has the same effect on your soil that antibiotics do in your gut!

They wipe out all the good bugs & strips it bare of nutrition… ultimately leading to nutrient deficient food.

So not only does this mean weak & disease prone plants – it also means that your plants won’t be receiving the vital nutrition that your body needs to thrive!

Tips for a Microbe Rich Soil

– Use Certified Organic Blackstrap Molasses throughout your garden – Microbes can’t get enough of it!

– Create a “SuperCharged” soil filled with nutrient dense Certified Organic materials – the perfect environment for microbes!

– STAY AWAY from any chemicals!

– STAW AWAY from any fertilisers & soils that aren’t CERTIFIED ORGANIC

– Don’t walk or stand on your soil!!! This can easily kill the microbes

– Remember “ORGANIC” in the Gardening World doesn’t necessary mean it doesn’t have chemicals in it – another reason to go for ‘CERTIFIED ORGANIC”

So in conclusion – Just like your gut… The more microbes in your soil – The more strong, vibrant & nutritious your plants will be.

Oh – & as an extra bonus for you – studies have shown that handling good quality, microbe rich soil is actually beneficial for your gut health! It’s a win win for your gut and your veggies!

Ginger, Tamari & Coconut Salmon


When I first started on my health journey, I so desperately needed to amp up my essential fatty acid intake, especially as I had been depriving my body of them for SO many years…

No matter how much “deep moisturising” cream I was putting on, my skin was always super dry, lips always bleeding, scalp always flakey, oh & cracked elbows & heels.. it was a lot of fun.

Queue in Essential Fatty Acids.

EFA’s play a HUGE role in our skin repair, the moisture content & how our skin handles environmental conditions.

But here’s the kicker…

Our body CANNOT produce it’s own EFA’s.

WE must get them through our diet!

and of course – what better way to do that than Salmon?

Only problem was… unless it was smoked… I just wasn’t a massive fan.

So little persistent me kept whipping up dish after dish until I hit the fish-pot! (Get it?)

Ginger, Tamari, Coconut, Salmon – oh boy do these ingredients get on like a house on fire! 

Not only does it taste awesome – the whole dish is just screaming with nourishing goodness!

On with the recipe…


Ginger, Tamari & Coconut Salmon (Serves 2)

Ingredients

2 Salmon Steaks (or fish of your choice)

1 Can BPA Free Coconut cream

1/4 Cup Tamari

3 Garlic cloves, minced

1 Thumbsize Knob of Ginger, grated

1 chili, diced

2 Tbsp. Sesame Seeds

4 Cups of seasonal organic veggies (make sure to include some green)

 Crunchy Slaw for top of Fish

1 Large Carrot, grated

1 Large Beetroot, grated

1 small apple, grated

Method

Pour a 1/4 of the coconut cream in a pan on medium heat.

Add the garlic, ginger & chili into the cream & cook for a few minutes.

Add salmon steaks & then veggies, positioning the veggies around the sides the salmon.

Add the rest of the coconut cream, tamari & seasme seeds.

Cook for 5 minutes  & then flip salmon. Cook for another 5 minutes or until Salmon has cooked through.

Mix Carrot, Beetroot & Apple together & serve on top of Salmon

– Healthy Notes – 

Wild Salmon is extremely difficult to get in Australia (even if you see it in your “fresh” fish shops – it’s most likely farmed. We purchase our Salmon frozen from a brand called “This Fish” which is Certified Organic!)

Other Good fish choices include Snapper & Barramundi

Make sure you get a BPA Free can of coconut cream – we use OnRich Organic Coconut Cream 

Leave the minced garlic out for 10 minutes before you use it, this will activate its anti-bacterial properties


Any Qs, please let me know!

If you like, please share with your friends & fam 🙂

C xo

How To Make The PERFECT Green Juice For Your Health + Our Daily Greens Recipe!

I have had a green juice every single day for the last 2 & a half years of my life. True story.

Why?

When I first started my health journey by body was just THAT undernourished that I needed to amp up my nutrient intake ASAP.

Queue in Green Juice.

2 & a half years later, it’s now one of my daily non-negotiable’s when it comes to my health regime… because it’s just that damn good!

Contrary to what some people think, juices & smoothies are not the same thing…

Oh… & you can’t make a juice in a blender! (Unless you blitz up the greens and squeeze it as hard as you can through a nut milk bag… then some juice should come out…maybe don’t do this.)

Although I do love a green smoothie every now & then (& Anth has one daily for his brekky – recipe up soon!)…
The difference is that the juicing process takes out all the indigestible fibre, allowing the vital nutrients from the produce to be released into your blood stream straight away.

This gives the digestive system a nice break + allows you to consume a HEAP more veggies than if you were to eat them whole (or if you were to blend them into a smoothie).

…Imagine chowing down on a head of lettuce, cucumber, bunch of parsley, a bunch of chard + let’s throw in some kale… not bloody likely.

When we consume a juice, (given the produce was grown in mineral packed soil – find out more here) we get a powerful shot of minerals vitamins, antioxidants & phytochemicals straight into our blood stream, giving us a nice boost of energy & of course allowing us to incorporate a lot more greens into our daily diet.

You may have heard of a ‘juice detox cleanse’ before? This is because they help our body with the detoxification process (helping to remove toxins like pesticide residues which can get stored in our fatty tissue :S)


Will adding Raw Kale to your diet mess up your hormones?

You’ve probably heard that cruciferous veggies like kale can mess with your thyroid & you SHOULD NEVER have it raw… Well here’s the deal…

Over millions of years of evolution, plants have developed chemical compounds that are designed as defence mechanisms to stop the plants being eaten by bugs, basically these chemicals act as natural pesticides – hey the plants want to survive just as much as you & I do! – these substances don’t generally kill the pests, they just mess with their nervous system so they’ll leave the plants alone.

Kale – along with other cruciferous veggies- contains one of these chemical compounds called isothiocyanate (that’s: eye-so-thigh-o-sigh-an-aid).

Isothiocyanate is the reason people are flipping out over raw kale.

So what’s the deal with poor old Iso?

First off, it’s been shown to reduce the risk of cancer by stopping pro-carcinogenic cells from becoming carcinogenic, & reducing the damage caused by activated carcinogenic cells. <– That’s right… it’s a good thing!

So why all the bad press?

Isothiocyanate has also been shown to cause thyroid problems by interfering with the absorption of iodine which can lead to hyperthyroidism – but only in INCREDIBLY HIGH DOSES – that last part is key. You would need to consume an insane amount for it to affect your thyroid like that, in fact, the only case study where hyperthyroidism actually occurred, was in an 88 year old woman who ate almost 2kg’s of raw bok choy every day for months!!

So don’t stress about adding a few leaves to your juice every day.


What else do green juices do?

More than anything, they help protect cellular damage from free radicals in our bodies.

What can free radicals do?  They are nasty little guys which can cause wrinkles, damage our arteries, contribute to a host of health issues like bowel disease, arthritis, diabetes… oh & the biggie – speed up the ageing process!

Amp up your greens to neutralise free radicals – do this by drinking green juices!


So how do we create the perfect juice?

JUICING RULES

  • Don’t add more then one piece of fruit to a juice as this will cause blood sugar spikes – if you want fruit in your juices, aim for around 80% veggies and 20% fruit.
  • Add a whole lemon or lime (we prefer lime), skin & all (providing it’s organic!!) as this combats the bitter taste of the greens! What’s more – even though they are technically acidic, they are ‘alkaline’ inside our bodies & help to get rid of the corrosive effects of the acids in our body.
  • Drink it all up within the first 15 minutes to reap the full benefits! After this timeframe the live enzymes start to get destroyed from the light & air.
  • Pick fresh leaves from your edible garden just before juicing, or if they are store bought, wash leaves the night before & leave out on the bench.
    This will make your juice room temperature which helps with digestion.
  • In the colder months, add fresh ginger (put it through the juicer!) as this will help warm up your body & promote circulation.

The perfect Juice Recipe  – C’s Daily…


Ingredients

6 Kale leaves (Stalk & all)

6 Silverbeet OR Chard leaves (Stalk & all)

4 Bok Choy leaves

2 Celery Ribs

6 big Cos Lettuce Leaves

1 small knob of ginger 

1 lime, cut up into quarters (so it will fit in the juicer!)

Method

Wash all produce (if store bought, wash with apple cider vinegar) & feed through juicer.

Mix to incorporate the lemon or lime through the whole juice & drink up 😉

On that note, I’m off to make my green juice!

Of course, if you have any Q’s I would love you to comment down below. Also – think a friend or fam member could benefit? Share it around 🙂

C xx

The Best Homemade Activated ABC Nut Butter

Activated ABC Butter… one of our all time favourite foods to eat & oh so easy to make!

Not only does it taste amazing & make the PERFECT snack (especially when you’re in a hurry!) – it’s an awesome way to provide your body with a dose of healthy fats, proteins & minerals including magnesium, zinc, Calcium & Selenium – all of which are vital for optimal health!

And just so we’re on the same page here…

ABC = Almonds, Brazil Nuts & Cashews

Oh Activated ABC Butter… where would we be without you?

Savoury or Sweet – Take Your Pick! 

The awesome thing about ABC butter is that it is just so damn versatile!

You can have it in deserts, dinners, snacks, brekky – so many options…

How we use it….

On apple slices

On carrot sticks

On green Bread

In our Satay Sauce

In Bliss Balls

In Biccies

In Cakes

In Smoothies

Oh and our fave…

Eating it straight out of the freaking jar ????????

The Perfect Traveler  

It’s also the perfect accompaniment when you’re our & about!

Lately we’ve been on the road quite a bit, which for us, means that it can be a little hard finding options to suit our needs…

Unless of course you have your handy dandy jar of ABC butter!

These days we WILL NOT travel without it!

So does it need to be ABC butter? What about other nut & seed butters?

Of course not! Other Nut & Seed butters are all great too – we just LOVE the taste of ABC + as they are 3 different nuts blended together, you get more nutritional goodness than just the one!

Does it have to be Activated?

Well…umm… the short of it – yes. Read all about it here.

Alright – now for the recipe!!

Ingredients

1 Cup Almonds

1 Cup Brazil Nuts

1 Cup Cashews

Method

Activate nuts by following the instructions over in this post & dry them in the oven for a MINIMUM of 10 hours… 12 hours is good! The longer you keep them in – the more oily and flavoursome your butter will be.

Once activated, put them in your high speed blender or food processor & slowly go up to the highest setting.

Blend on high for around 5 minutes or until you have your desired consistency. The longer you blend it for the smoother your butter will be.

*We make our butter in our Vitamix, to do this, just use your tamper & keep tampering until it starts to blend properly on it’s own.

The real reason behind Activated Seeds & Nuts + How to activate without a dehydrator

The first I heard about activated nuts was on the Today show a few years back, Karl Stefanovic & friends were having a laugh at the fact that their activated almonds gave them “Extra wanker points”!

Hah! I had a good laugh along with them & wondered why anyone would do such a thing – it seemed like a fad… a gimmick with no legs.

But it didn’t go away…

In fact I heard more & more people start talking about how they were flipping the switch & activating their nuts & seeds.

And then my wife got on the band wagon.

Forever making sure everything was soaked at least 8 hours before we could use them…

“Really babe? I mean come on… really?”

“YES!!!” She would firmly state… And just like that I knew I wasn’t taking the high ground! ????

Hmm – so maybe it is kind of important?

Either way – I was intrigued enough to start doing some digging…

And since that day, my wanker points have been doubling week by week!

Why Should You Activate Your Nuts & Seeds? 

It all comes down to phytic acid.

Phytic acid or ‘Phytates’ is a naturally occurring substance in nuts, seeds, grains & legumes & is the stored version of the mineral phosphorous in these foods.
The thing about phytic acid is that it’s not a fan of a number of essential minerals inside the body.
Particularly these 6:
– Iron
– Zinc
– Calcium
– Magnesium
– Chromium
– Manganese.

Phytates contain these things called enzyme inhibitors that attach themselves to these minerals & actually prevents the GI tract from absorbing them, meaning you miss out all on the benefits of these essential minerals, with longterm exposure leading to mineral deficiencies.

These minerals help the body with healthy bones, teeth & skin, as well as maintaining balanced hormones & keeping illness away.

Because of this, phytic acid is also known as an ‘anti-nutrient’ (a compound that interferes with the absorption of nutrients)

But what is the real reason behind it all anyway?

This might just blow your mind!

Plants require nutrition just like we do to be able to grow and survive.

Part of that survival includes producing & nourishing seeds to ensure the continuation of the species.

Now as you can imagine, these plants don’t want the seeds they produce to be eaten (I mean, it’s fair enough, who wants their kids to be eaten?) – So as a defence mechanism against predators, the seeds are given a number of inhibitors designed to affect the predators in such a way that they will no longer go after the seeds – phytates being one of them.

So phytic acid is part of a number of anti nutrients that appear in seeds that are actually meant as a counter measure to ensure the survival of future generations of plants by protecting them from predators as well as fungus or moulds, & to prepare the seeds for germination.

And just incase you were wondering where nuts & legumes fit it… they are actually seeds enclosed in a shell or pod…

Isn’t nature seriously amazing???

So how do you “Activate” them without anything fancy like a dehydrator?

By Soaking them in salt water & then chucking them in the oven at a super low heat!

Soaking your nuts & seeds in water neutralises & reduces the concentration of phytic acid while the salt helps to breakdown the enzyme inhibitors in them, making sure your body is able to easily absorb & get all the benefits of those awesome minerals that are essential for literally hundreds of biochemical processes!

It can seem daunting & time consuming, but turning your nuts & seeds into little mineral loving super snacks is a cinch!

It really comes down to these 3 steps:

-Soak
-Dry
-Enjoy!

Here’s exactly how to do it…

ACTIVATING NUTS & SEEDS

Ingredients:

  • Nuts/Seeds of your choice
  • Celtic Sea Salt or Himalayan Rock Salt
  • Filtered water

Method:

  • Soak your nuts/seeds of choice in a bowl of filtered water with a teaspoon of salt for a minimum of 8 hours, make sure they are covered with water the entire time
  • After the 8 hour minimum, drain the water, rinse with fresh water & spread the nuts out onto a baking tray.
  • Pop them in the oven on a super low heat – about 50°C (122 °F) – for around 10 hours (overnight works like a charm!)
  • Remove from the oven & you’re done! (lame joke about being a wanker is optional)

Super easy!

And of course – any Q’s – drop em in the comments below!

Speak soon – Anth

P.S – if you think this might be useful to any of your mates – I would love for you to share it with them!

Essential Minerals – Is Your Body Missing Out?

Did you know that minerals are one of the most important substances for our bodies – period.

Many people think that minerals are just an extension of vitamins… & if they get their vitamin supps up to scratch it should be sweet…

But here’s the punchline – our bodies NEED minerals to help us absorb vitamins properly.

Think you might have a vitamin deficiency? It could in fact be a mineral deficiency.

What Else Do Minerals Do For Us?

As well as helping your body perform an array of biochemical processes…

– They help build your bones, teeth, connective tissue & cell membranes

– They help balance your sex hormones

– They help you relax

– They treat illness or prevent illnesses from becoming worse

– They help maintain your pH balance (enzymes turn minerals into an alkalising detoxifying agent, neutralising acid & preparing them for elimination)

We can’t stress how important minerals are for thriving health… so much so that we have decided to add a new little segment into onto The Healthy Files spotlighting a range of different amazing minerals, what they can do for your body + the symptoms you can get from being deficient – stay tuned for this!

But what does this have to do with growing your own food??

EVERYTHING

Literally… everything.

In fact – it’s the reason we started growing our own supercharged food in the first place – & why we know that anyone who is trying to amp up their health NEEDS to start growing their own supercharged food too!

essential-minerals-9

Why?

Because we can’t produce minerals within our own bodies – we need to get it from our soil – but because we can’t eat the soil, plants act as the middle men, taking the nutrients from the soil & making them available to us as beautiful foods.

The thing is… the level of the minerals in the food you eat is determined by the levels of minerals in the soil to which the food grows in.

…You know the old saying “You are what you eat”? Well let’s change that right now to “You are what you eat, ate.”

If the minerals aren’t in the soil to begin with, the plant isn’t going to contain those minerals either.

In other words – Low levels of minerals in the soil = low levels of minerals in your food = low levels of minerals in YOU.

minerals-in-the-soil-4

But why would there be low levels of minerals in the soil anyway??

The thing about good, fertile soil is that for a layer only 10cm deep to form naturally, the process takes roughly 2000 years… think about that… 2000 years!!

Many studies have shown a rapid decline in mineral profiles due to the rise of modern agricultural practices, use of chemical fertilisers & ongoing deforestation. The once rich & fertile soil is now incapable of supporting & nourishing growth of produce on it’s own.

In 1992 the Earth Summit Report showed an estimated decline of total minerals in American soil of 85% in the last 100 years! Unfortunately Australia wasn’t far behind. That was in 1992 – imagine where we are at today! In other words what your grandparents called food compared to what we call food today are two very different things.

The Minerals We Need To Thrive:

There are over 100 minerals out there, but we don’t need all of them for our body! Here are the minerals we need to be consuming daily:

MACRO MINERALS (The body requires 100 milligrams or more per day) 

– Calcium

– Phosphorous

– Potassium

– Magnesium

– Sulfar

– Sodium

– Chloride

MICRO MINERALS/TRACE MINERALS (The body requires less than 100 milligrams per day but still equally as important as MACRO MINERALS!) 

– Iron

– Boron

– Chromium

– Iodine

– Manganese

– Molybdenum

– Selenium

– Silicon

– Vanadium

– Zinc 

– Lithium

– Germanium

– Rubidium

– Cobalt

– Copper

So how on earth do we get these minerals?

By growing our own supercharged food!!

It can be easy to think that all you need to grow some good quality food is some dirt & some seeds… Especially if you’ve watched Dickon from The Secret Garden throwing around seeds like there is no tomorrow & plants just start sprouting out of nowhere 😉

 essential-minerals-2-dickon

But as you now understand – it really is so much more than that!

Nutrients levels in the soil is everything & it’s literally the deciding factor in how nourishing the food you eat is!

This is where growing your own food in supercharged soil comes in!

You can have control over the amount of nutrients in your food by planting into a soil that has been specifically created to be as healthy & nutritionally dense as possible!

minerals-in-the-soil-5

This is what we call “supercharged food”… Food that has been grown in Supercharged soil! (Wondering how to create supercharged soil? We’re working on something special for you as we speak – we can’t spill the beans just yet but we promise it will be a cracker!)

Growing your own Supercharged food is essential for a thriving body & to amp up your health… Oh, and as a bonus, supercharged soil also means a low maintenance thriving edible garden!!

minerals-in-the-soil-6

Stay tuned for our mineral spotlights where we take you deeper into the awesome amazing world of minerals & everything they can do for your health!

C x


< 2 / 3 >

So, so thankful to Crystal & Anth... What a brilliantly done, much needed business these two incredible health ambassadors have created.

Pete Evans
Chef, Author, TV Presenter

Keep your carrot fuelled eyes peeled for what Anth & Crystal have to share. They're passion & knowledge is helping to make both humans and the planet happier and better nourished. So thankful for all that they do!

Dr Libby Weaver
Nutritional Biochemist, Author, Speaker

Anth and Crystal are helping all of us be better humans through outstanding nutrition that grows before our eyes and for that I’m so grateful!

Dr Nat Kringoudis
Doctor of TCM, Author, Speaker

If you're looking for some fuss-free inspiration to live a healthier life, let Anth & Crystal lead the way. Their awesome combination of passion, vibrancy and knowledge will have you fuelling your body in the very best way, just as nature intended.

Amy Crawford
Founder of The Holistic Ingredient, CTC Master Therapist

Crystal and Anth are true health warriors… they walk their talk and share their knowledge freely!

Adele McConnell
Founder of Vegiehead, Author, Chef

CONNECT WITH US