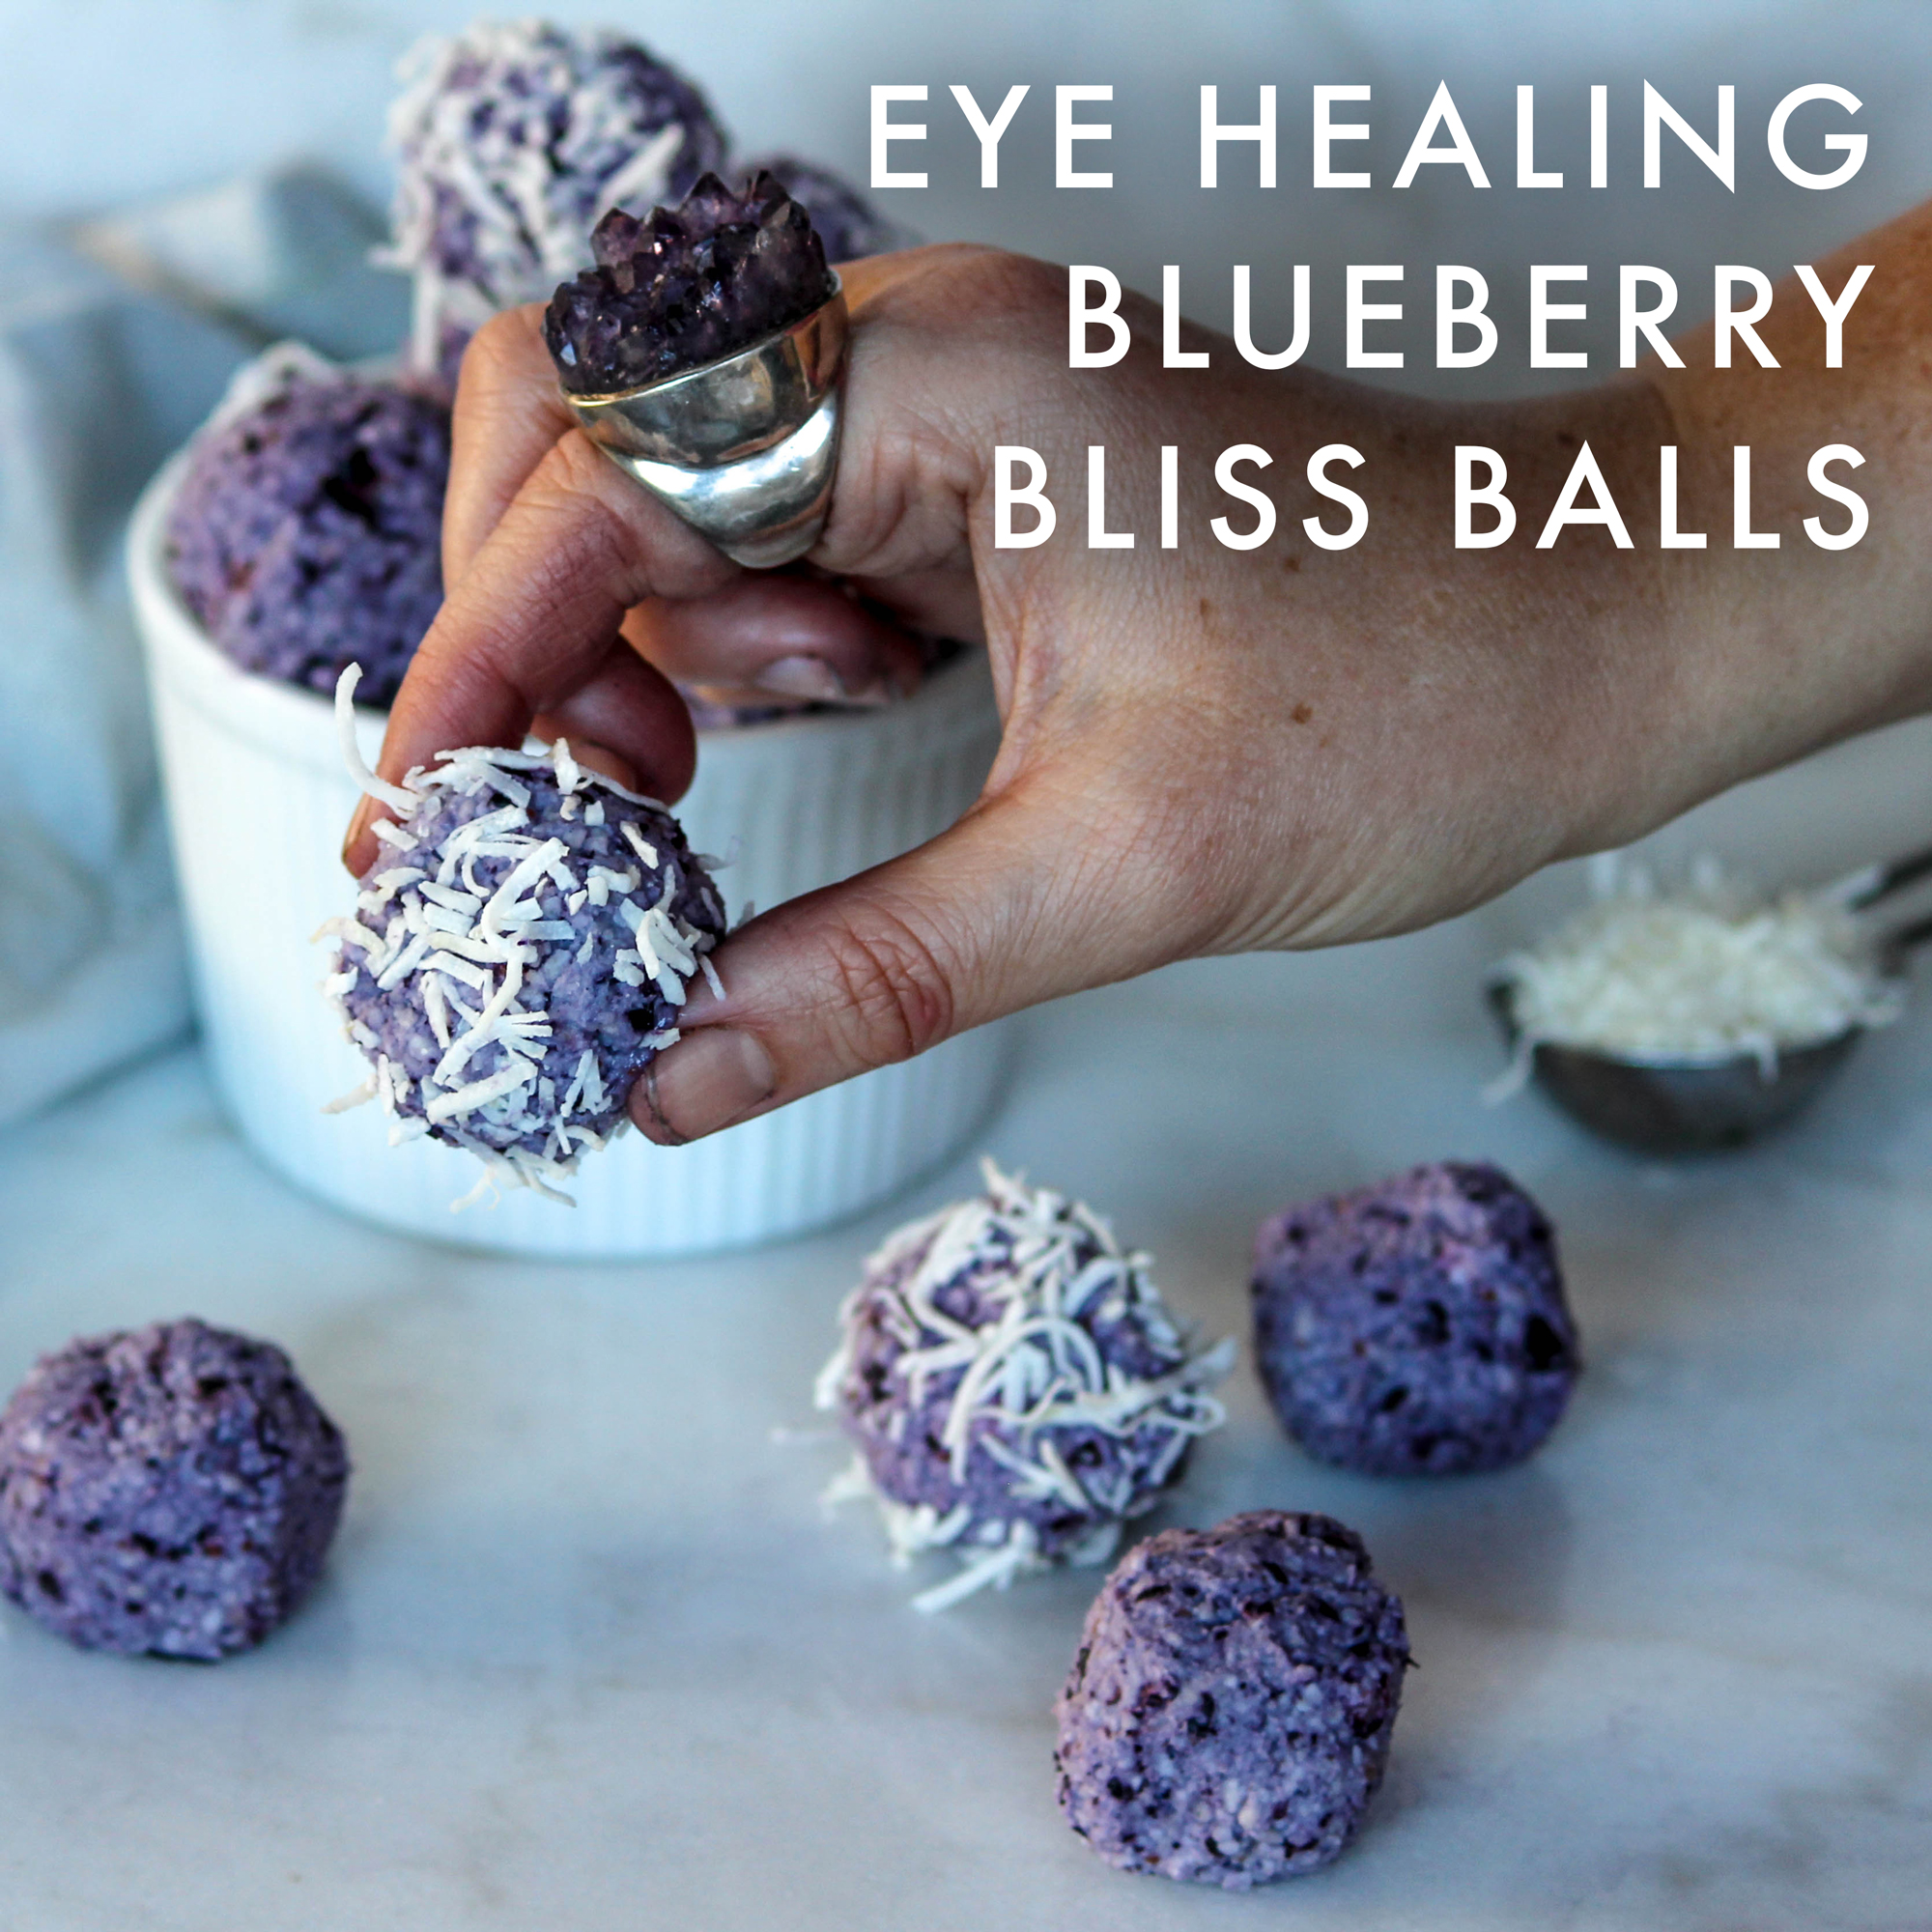
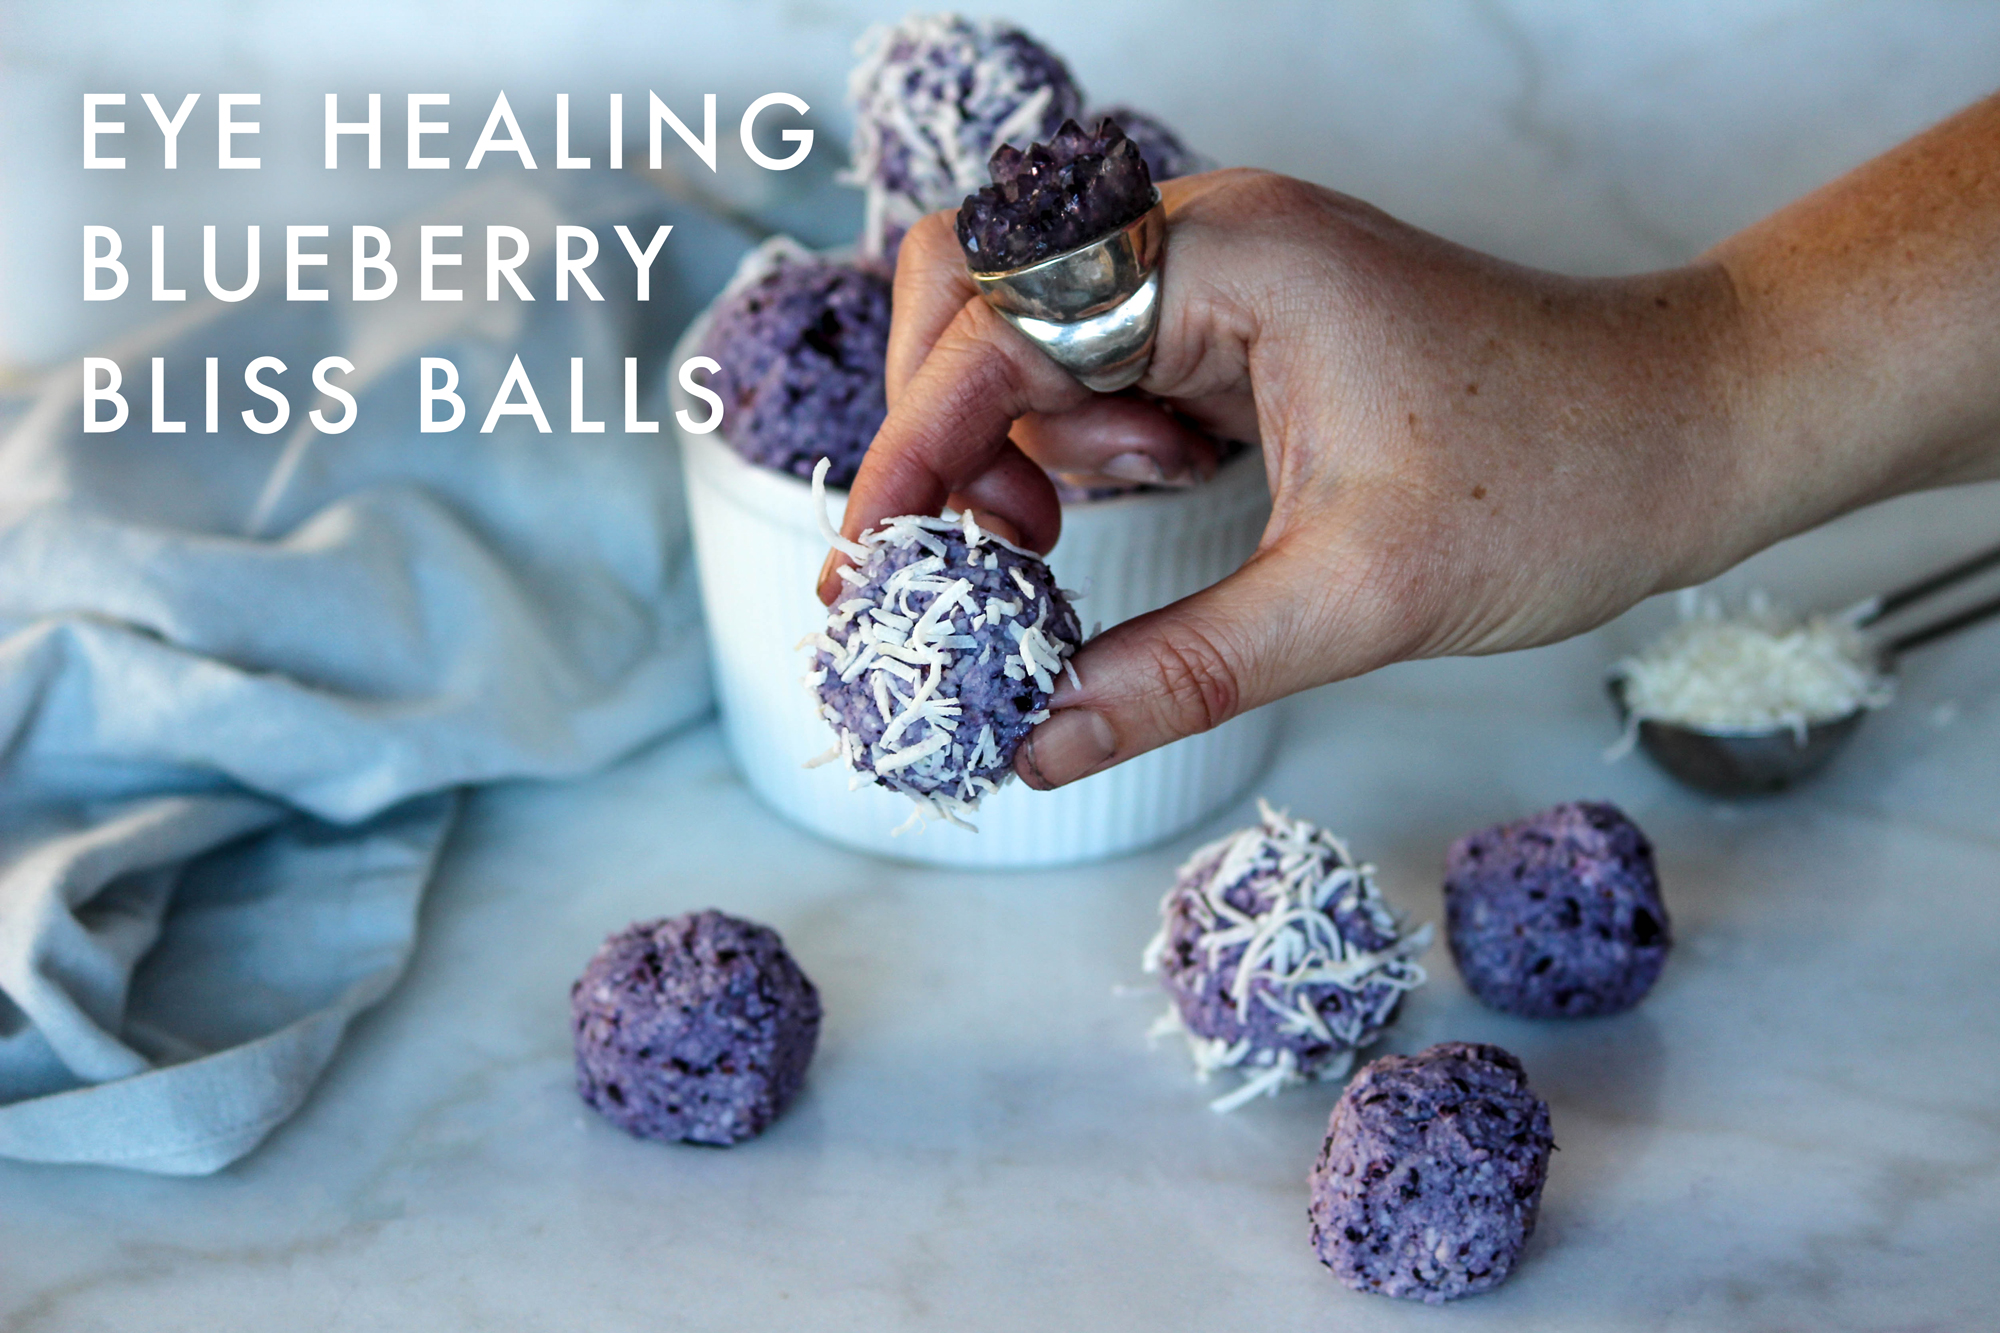
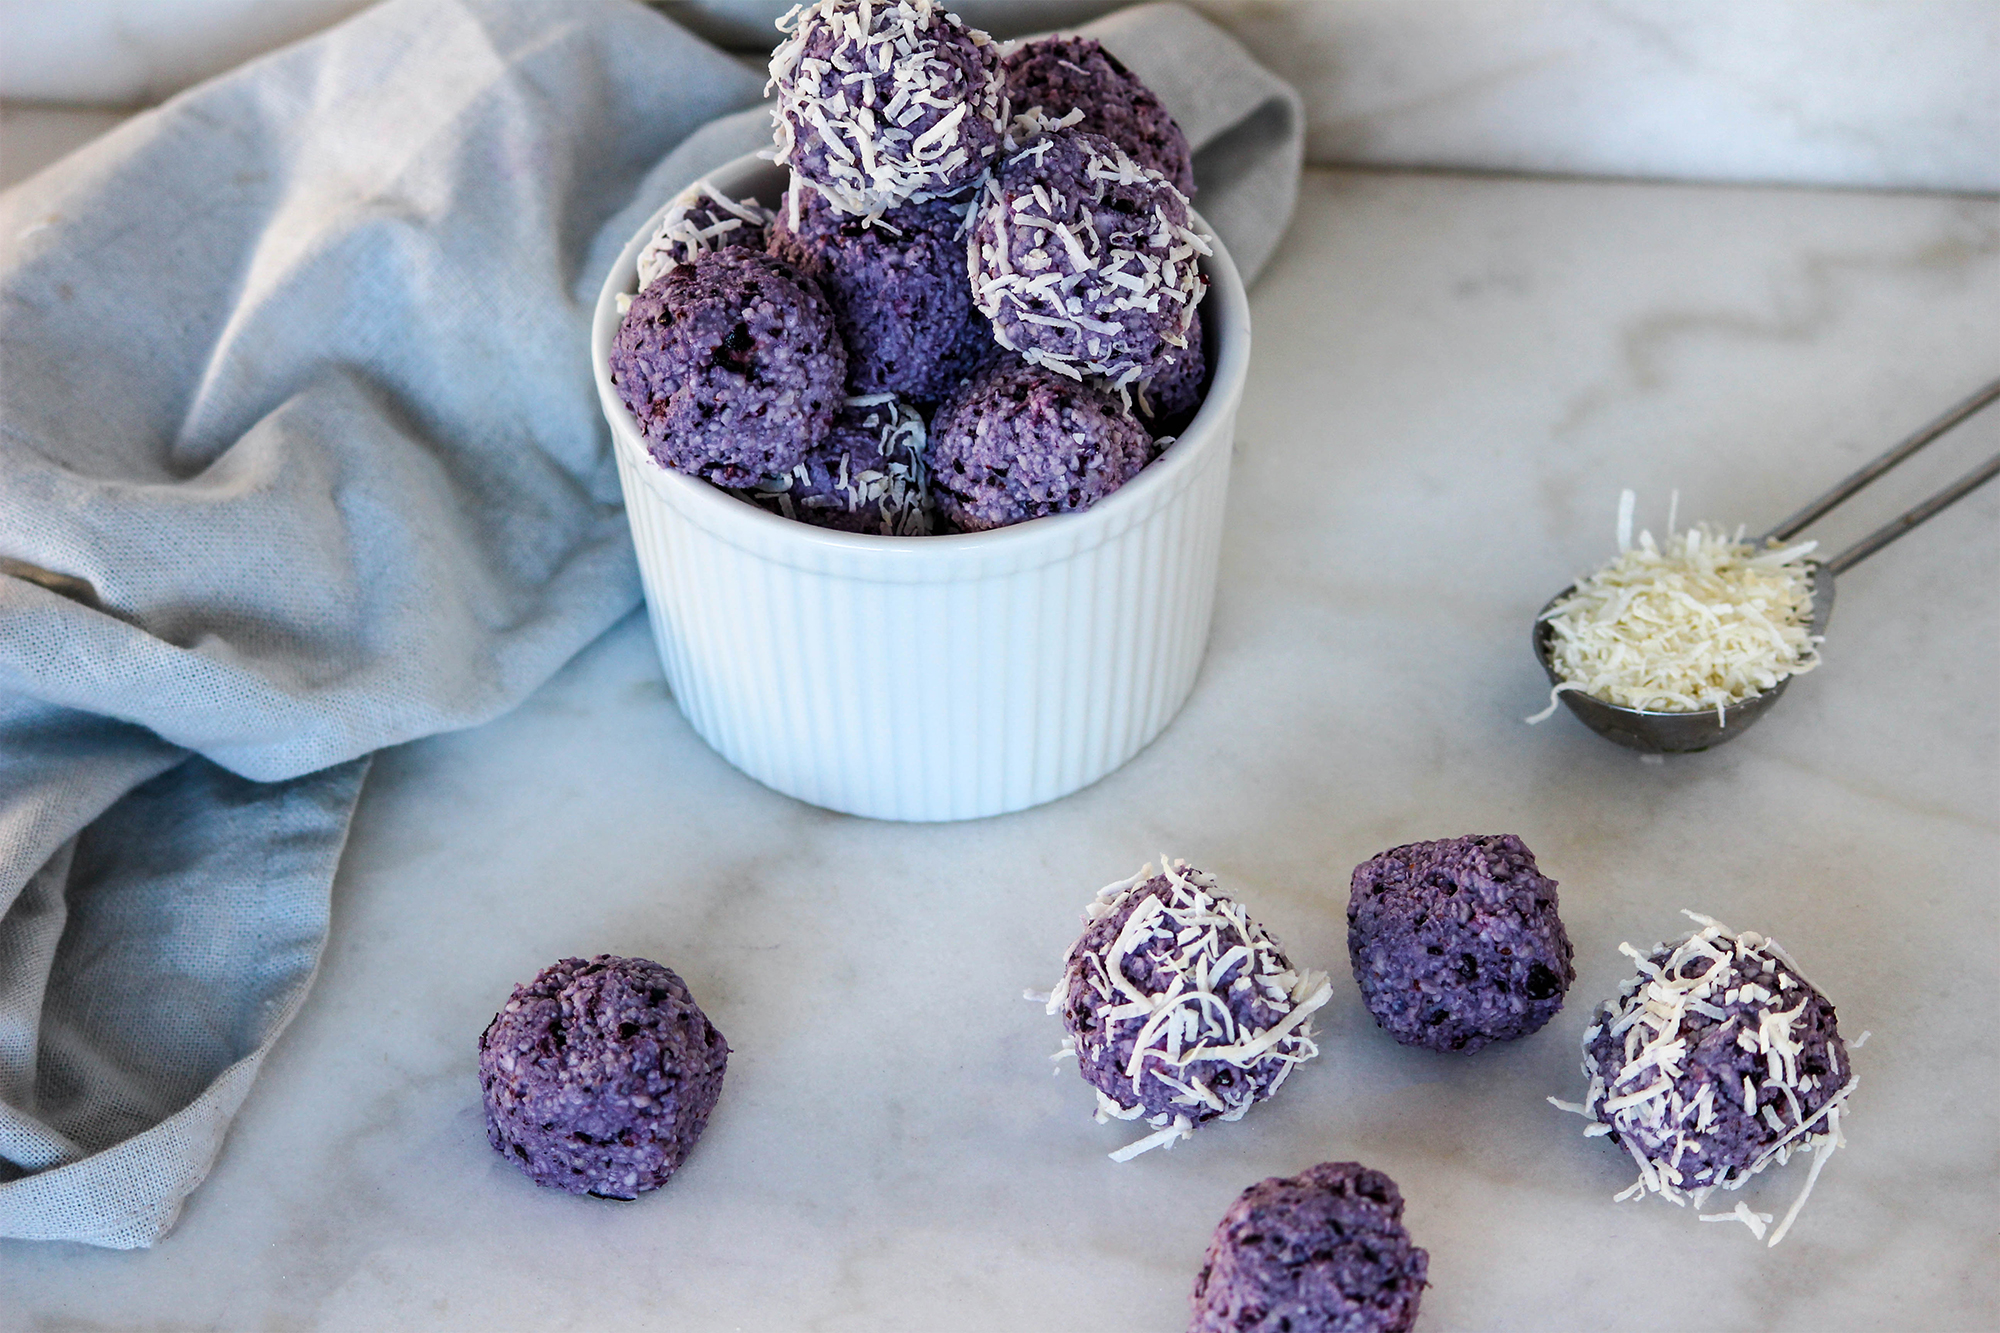
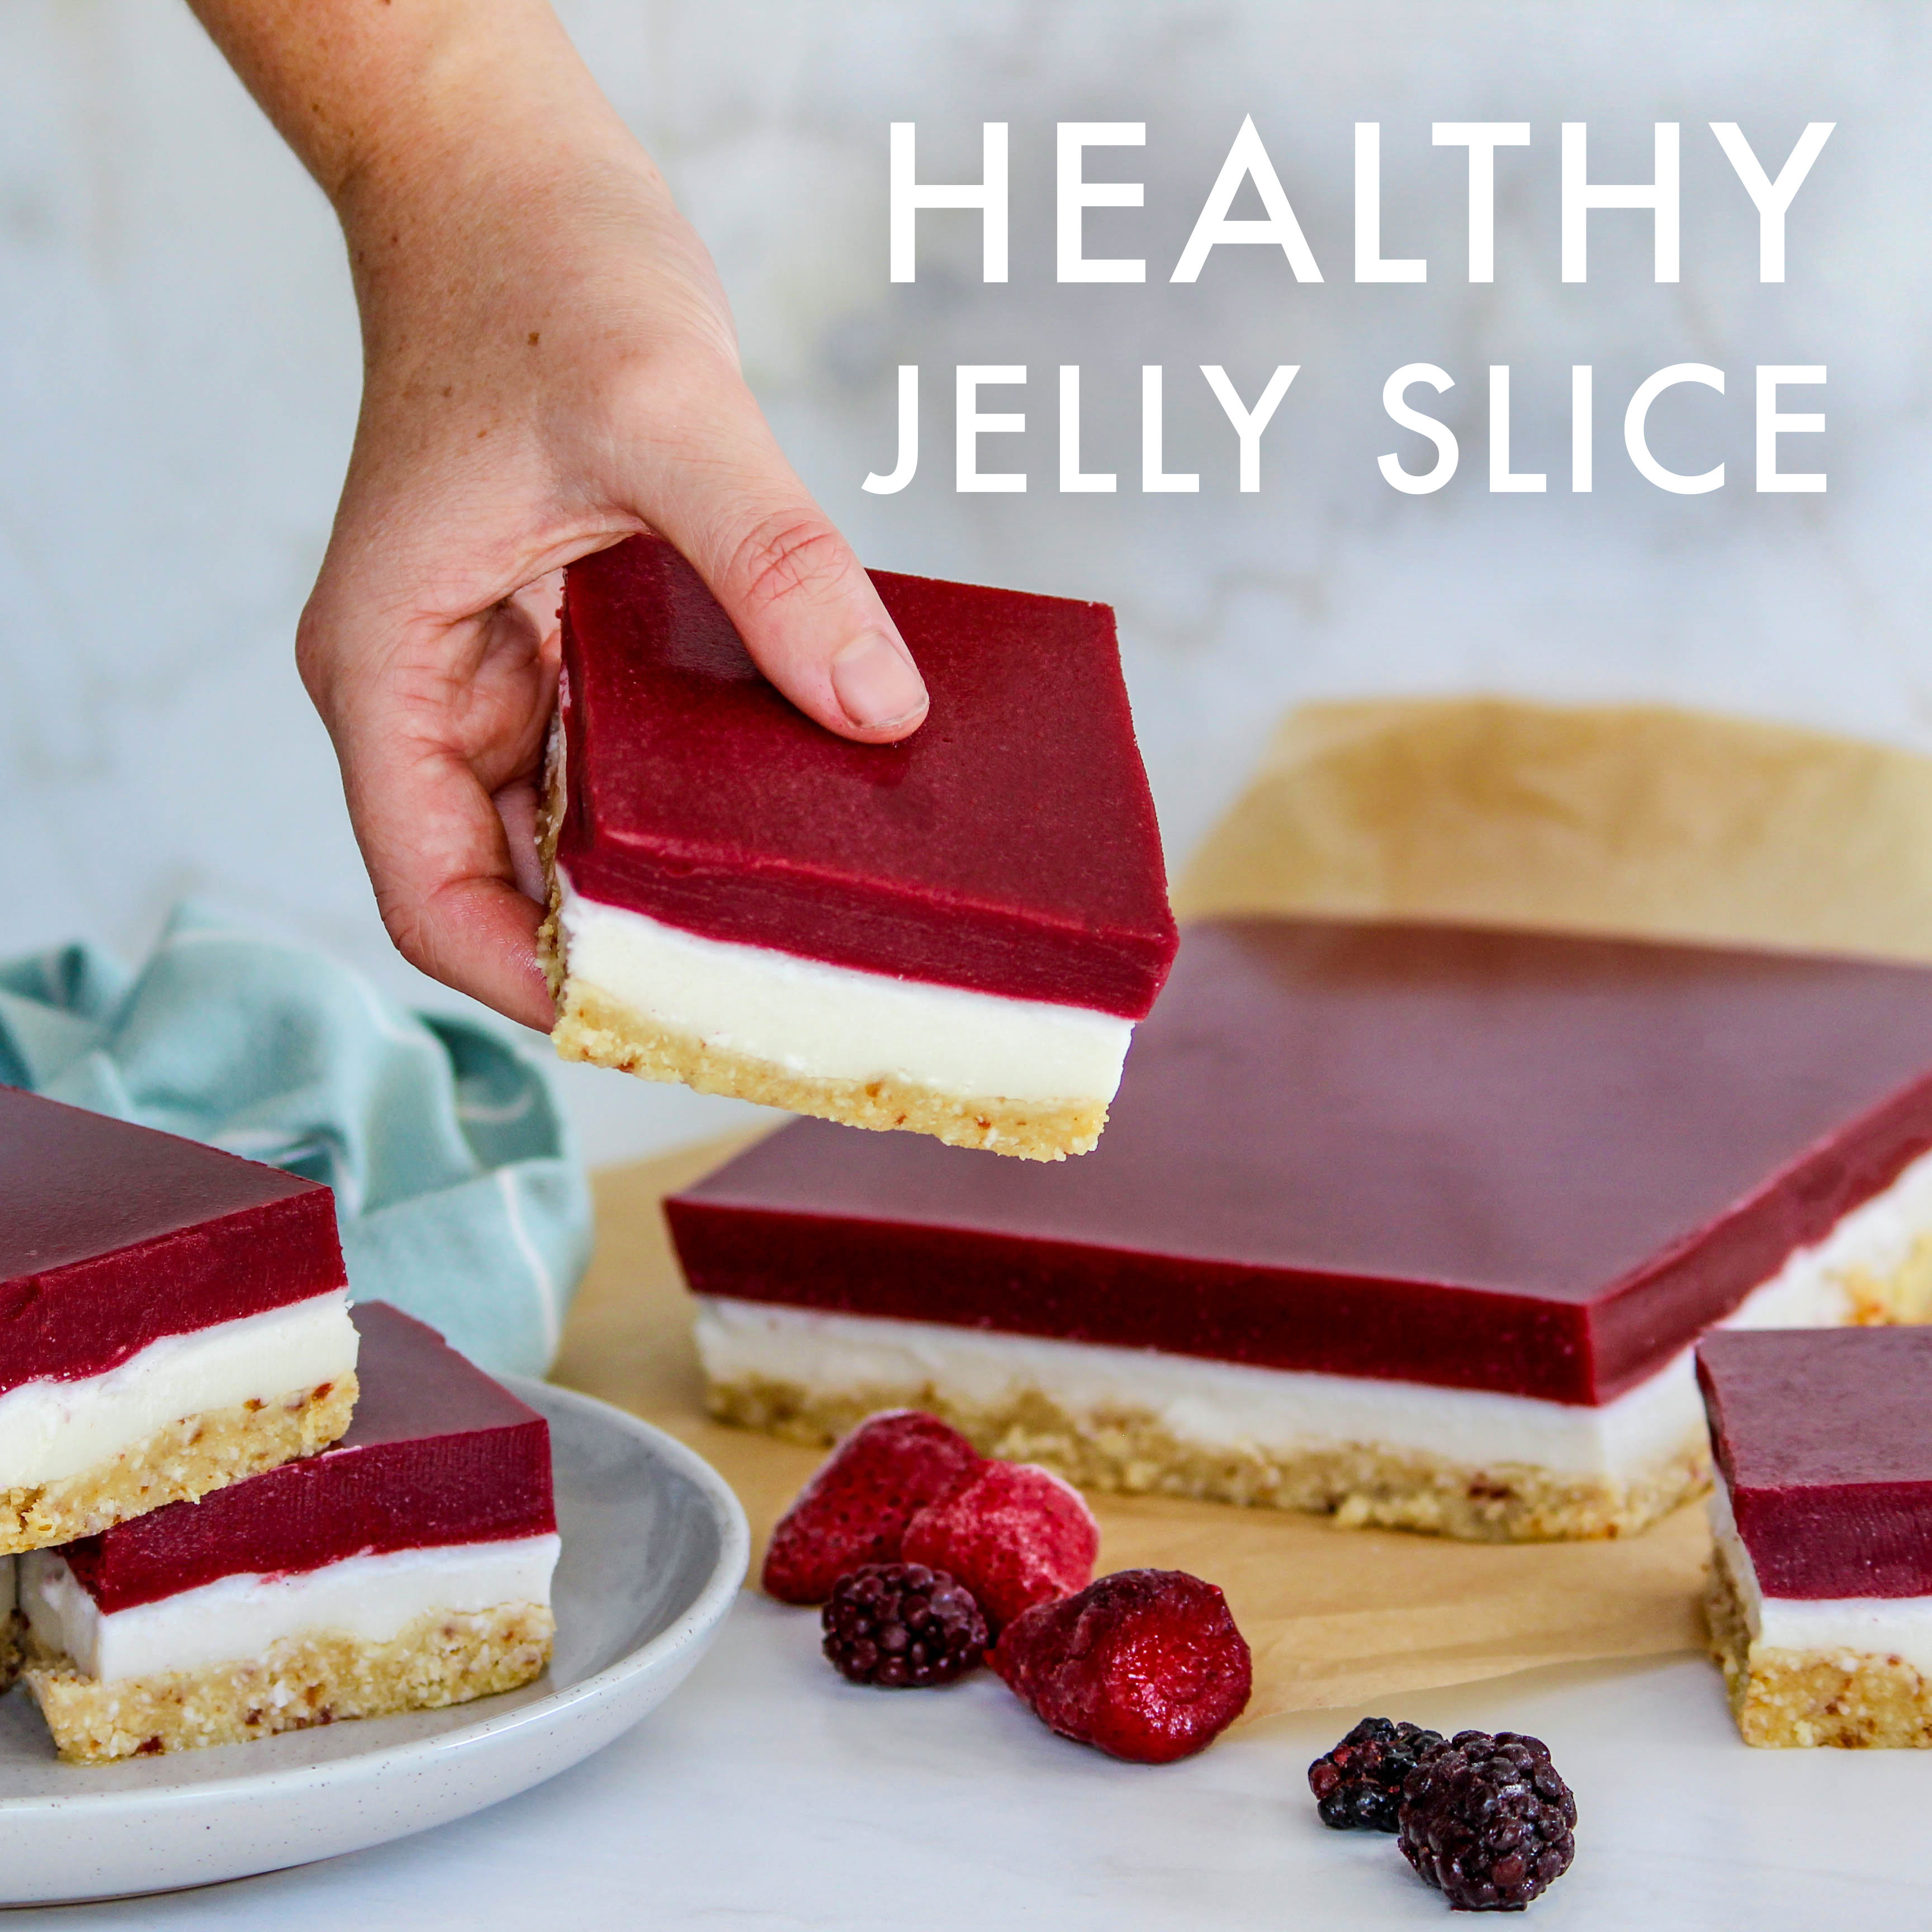
Healthy Jelly Slice

Jelly slice… my all time childhood favourite!

I couldn’t tell you how many slices of this bad boy I devoured as a kid.

Unfortunately though, the ingredients in this slice were anything but healthy!

In fact ‘traditional’ Jelly Slice is generally made from Arnott’s ‘Marie’ biscuits (exact ingredients: Wheat Flour, Sugar, Vegetable Oil (Contains: Soy), Golden Syrup, Baking Powder, Salt, Flavour, Milk Solids)…. Nestle sweetened condensed milk (which is pasteurised milk & sugar) & then to top it off, raspberry aeroplane jelly (exact ingredients: Sugar, Gelatine (Beef Origin), Acidity Regulators (297, 331), Flavour, Colours (122, 133))

So in a nut shell… sugar, soybean oil, pasteurised milk… & more sugar.

This can then cascade into destroyed gut bugs, hormonal imbalances, increased free radicals, reduced Vitamin C intake… & that’s just the half of it.

…Why is Nestle called the “Leading Nutrition, Health & Wellness” company again? Maybe we’re in upside down world?

Needless to say… this is NOT the type of Jelly Slice you want to be eating – I don’t care how small the piece is or how delicious it tastes!

But the good news is that you don’t have to eat unhealthy Jelly Slice EVER again!

The recipe that I’m about to share with you not only tastes delicious… but there’s absolutely NO “fake” ingredients in there! Only real wholefoods & REAL gut healing gelatin… & all free from refined sugars, gluten, dairy & grains.

If you’re an old time Healthy Patcher you might have already seen one of our “Healthy Jelly Slice” recipes, but this is the new & improved version!

It contains less natural sugar (but is still perfectly sweet) & is a lot easier to make!

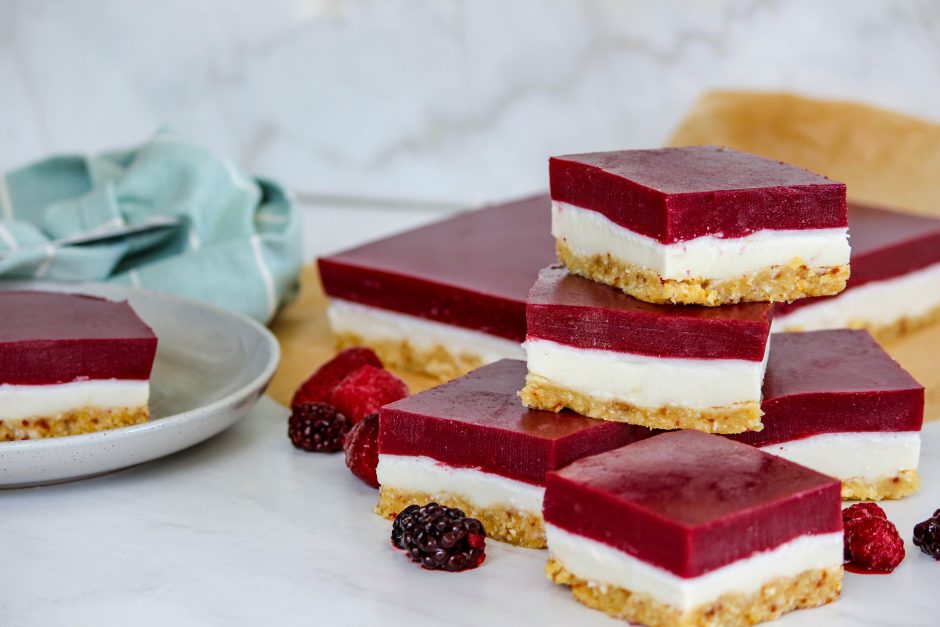
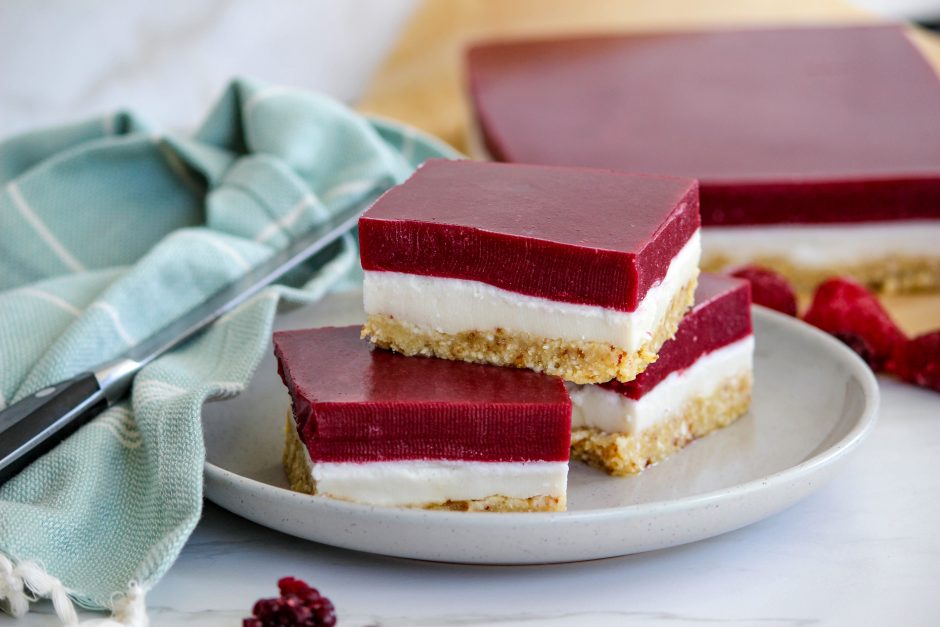
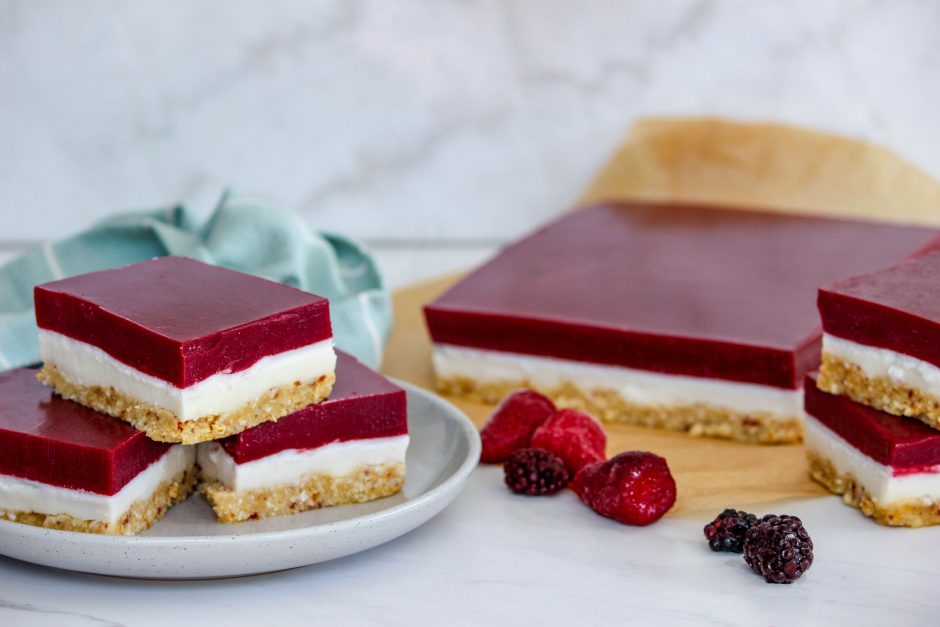
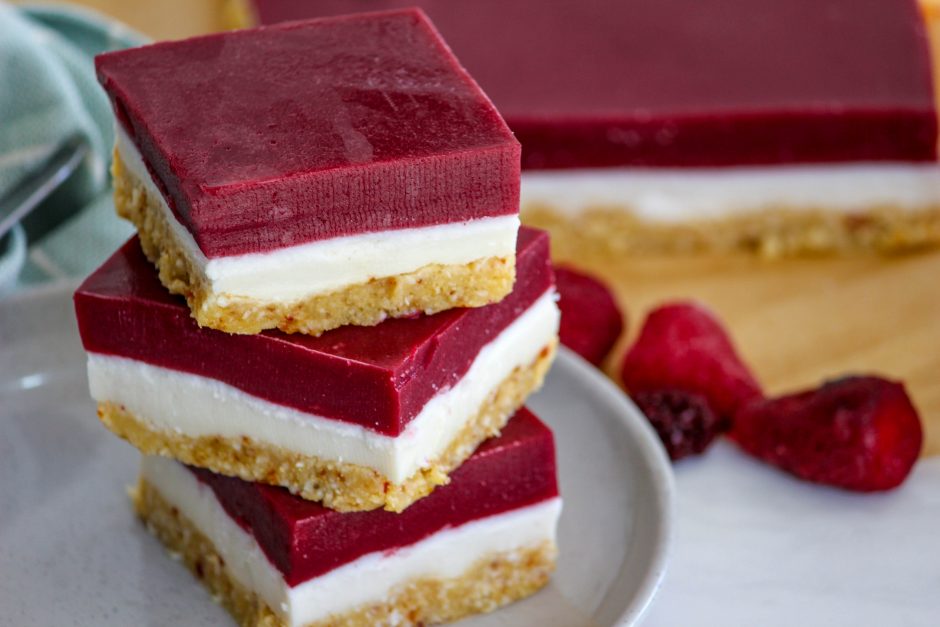
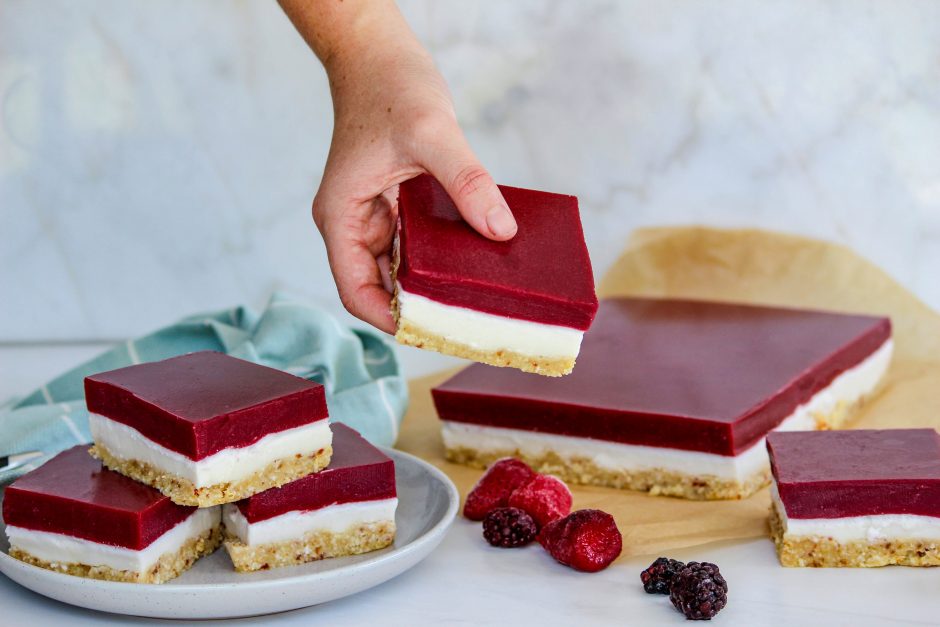
The base contains almonds which are an awesome source of monounsaturated fat, which helps to reduce insulin sensitivity, leading to less stored body fat. They also contain Vitamin E, which helps to keep your skin healthy & clear.

The middle layer is predominately made from coconut cream which gives you a good dose of slow burning energy. It increases your metabolism, keeps you full for longer & helps you to burn fat.

The jelly is made from mixed berries & grass fed Gelatin. Gelatin supports the lining of your gut which is vital for stopping undigested food particles from getting out of your stomach & into your blood stream – AKA Leaky Gut – which can lead to inflammation & auto-immune conditions. It’s also been shown to improve sleep quality & reduce day time drowsiness!

Now this recipe is really easy, however if you’ve never worked with Gelatin before, let me give you some pointers 🙂

GELATIN POINTERS:

#1. Firstly, there are 2 types of Gelatin that you can use. There is Gelatin powder & “sheet leaf” Gelatin.

The leaf style gelatin is generally used over the powder in desserts because it is meant to dissolve better & meant to be a “clearer & smoother” jelly. We have used both & they are both pretty much the same.

#2. For the powdered gelatin we purchase “Great Lakes Unflavoured Gelatin” from iHerb here.

For the leaf gelatin we purchase “Chefs choice silver grade leaf gelatin”.

If you go with the powdered gelatin, you need to soak the powder in a little cold water for about 5 minutes… after which you need to add it to hot liquid. It then needs to be stirred so all the lumps are out, & then set in the fridge for a few hours or the freezer for about an hour.

Now this is a lot easier than it sounds… Just grab a little bowl, put your required amount of gelatin in it, & then add the water. You want the water to be double the amount of the gelatin. E.g 2 tbsp. Gelatin = 4 tbsp. Water.

After 5 minutes the water will be gone & instead, you’ll see a nice big ball of gel 🙂 Then you simply add your gel ball to your hot liquid & stir!

If you’re using the leaf gelatin it’s a really similar process – just soak the leaves in ice cold water for about 5 minutes & once they’ve expanded & go “jelly like” gently squeeze out any remaining water, add the jelly leaf to the hot liquid & stir.

#3. One more pointer & then we’ll get to it… a little gelatin goes ALONG way!

If you use hydrolysed collagen in your food… & you’re anything like me & Anth, you might be used to not measuring it out… or just going plain nuts with the stuff.

HOWEVER… Gelatin on the other hand – although super tempting to add extra because of its health benefits – will go firmer & firmer the more you use.

Another tbsp than what this recipe calls for will most likely result in gummy bear texture – not what you want… we’re making jelly, not gummy bears 😉

So unless you’re some kind of Gelatin wizard, stick to the recipe :p
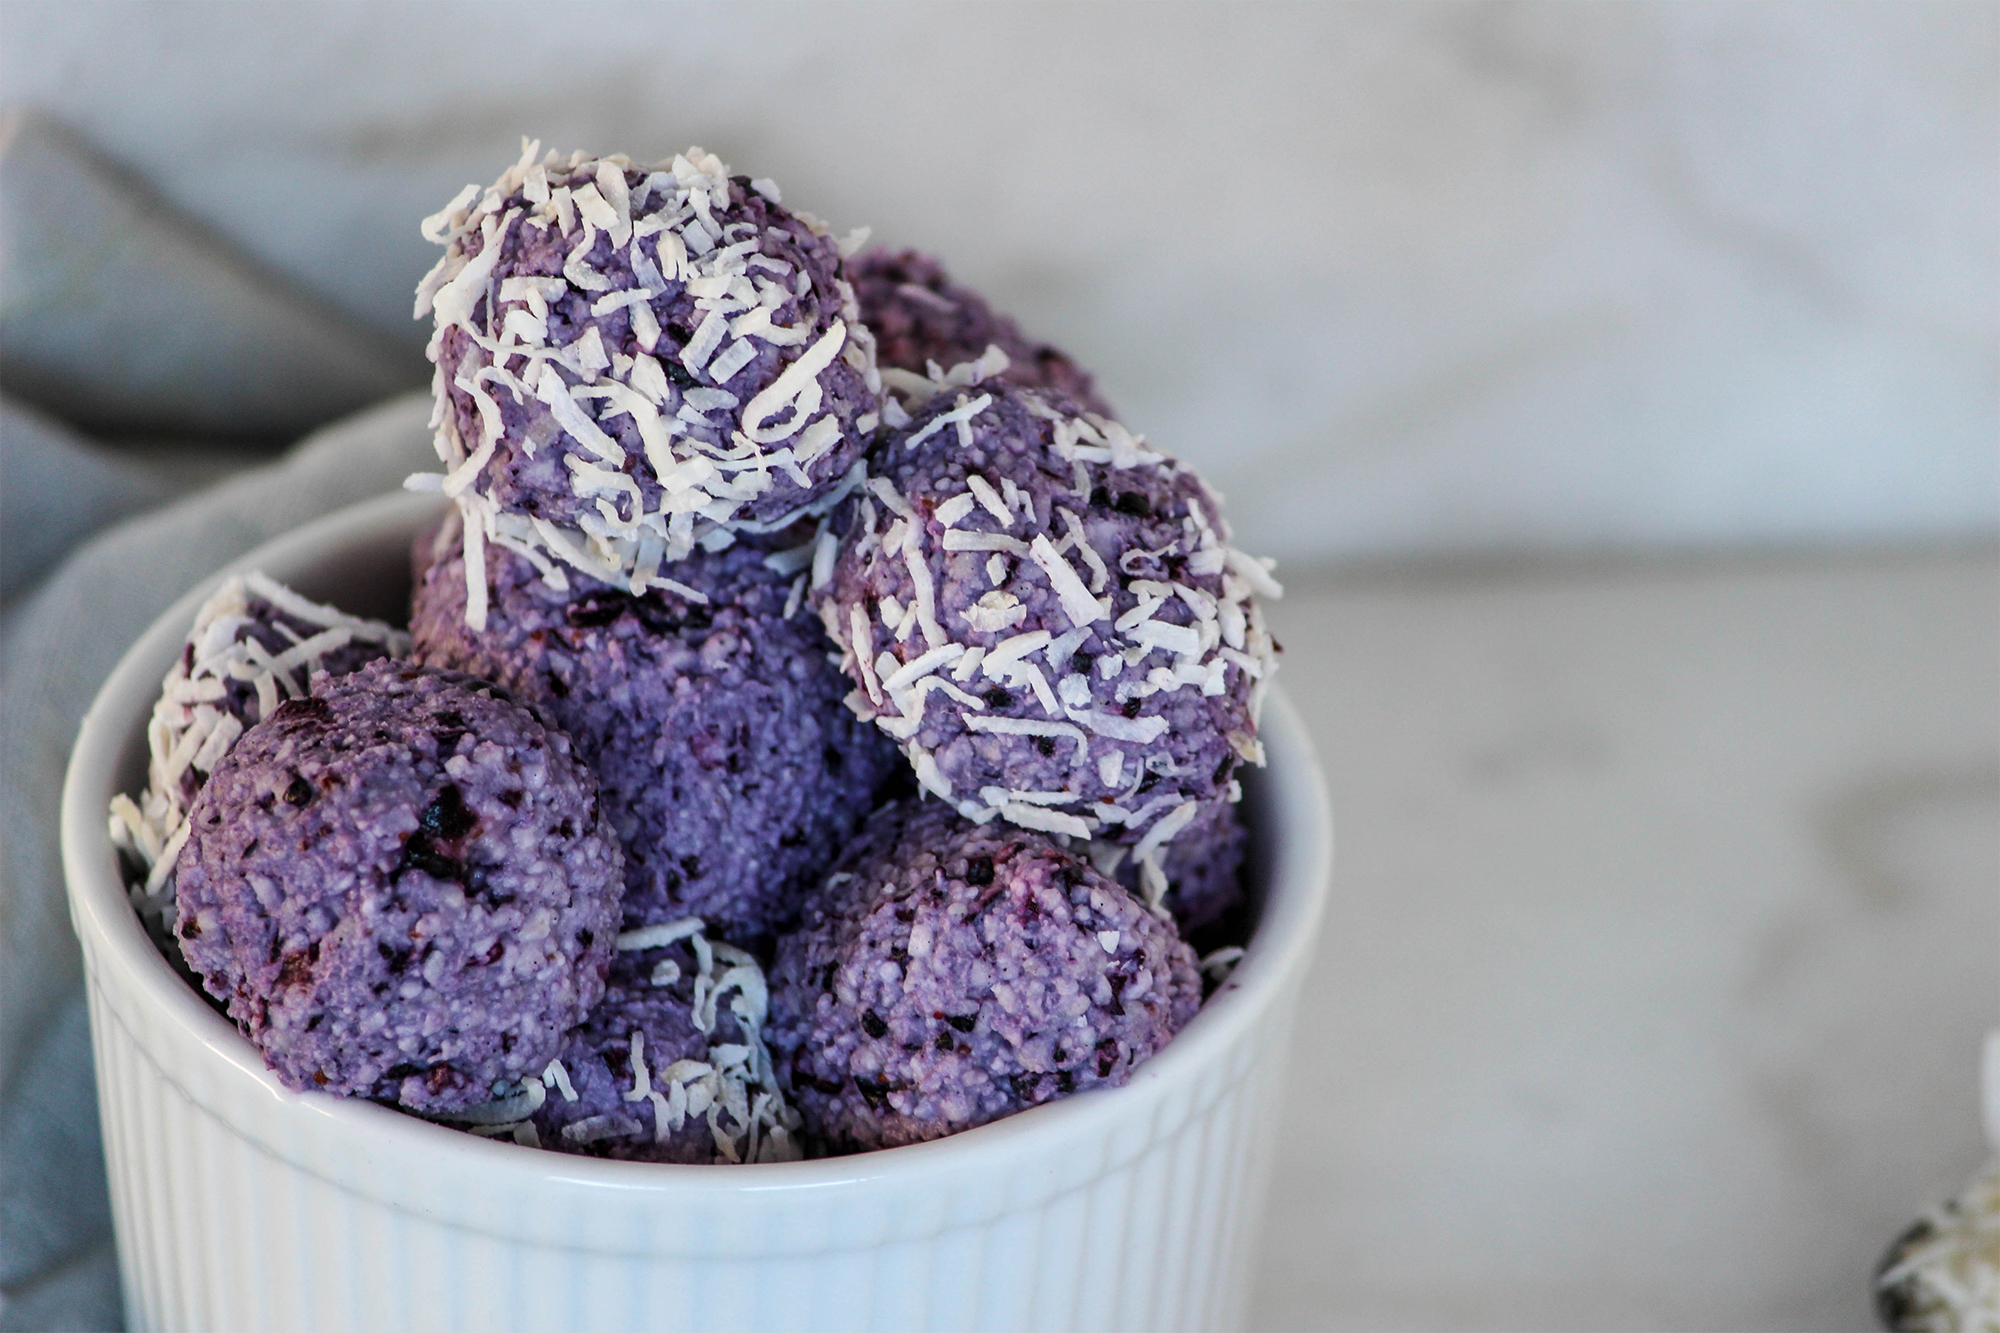
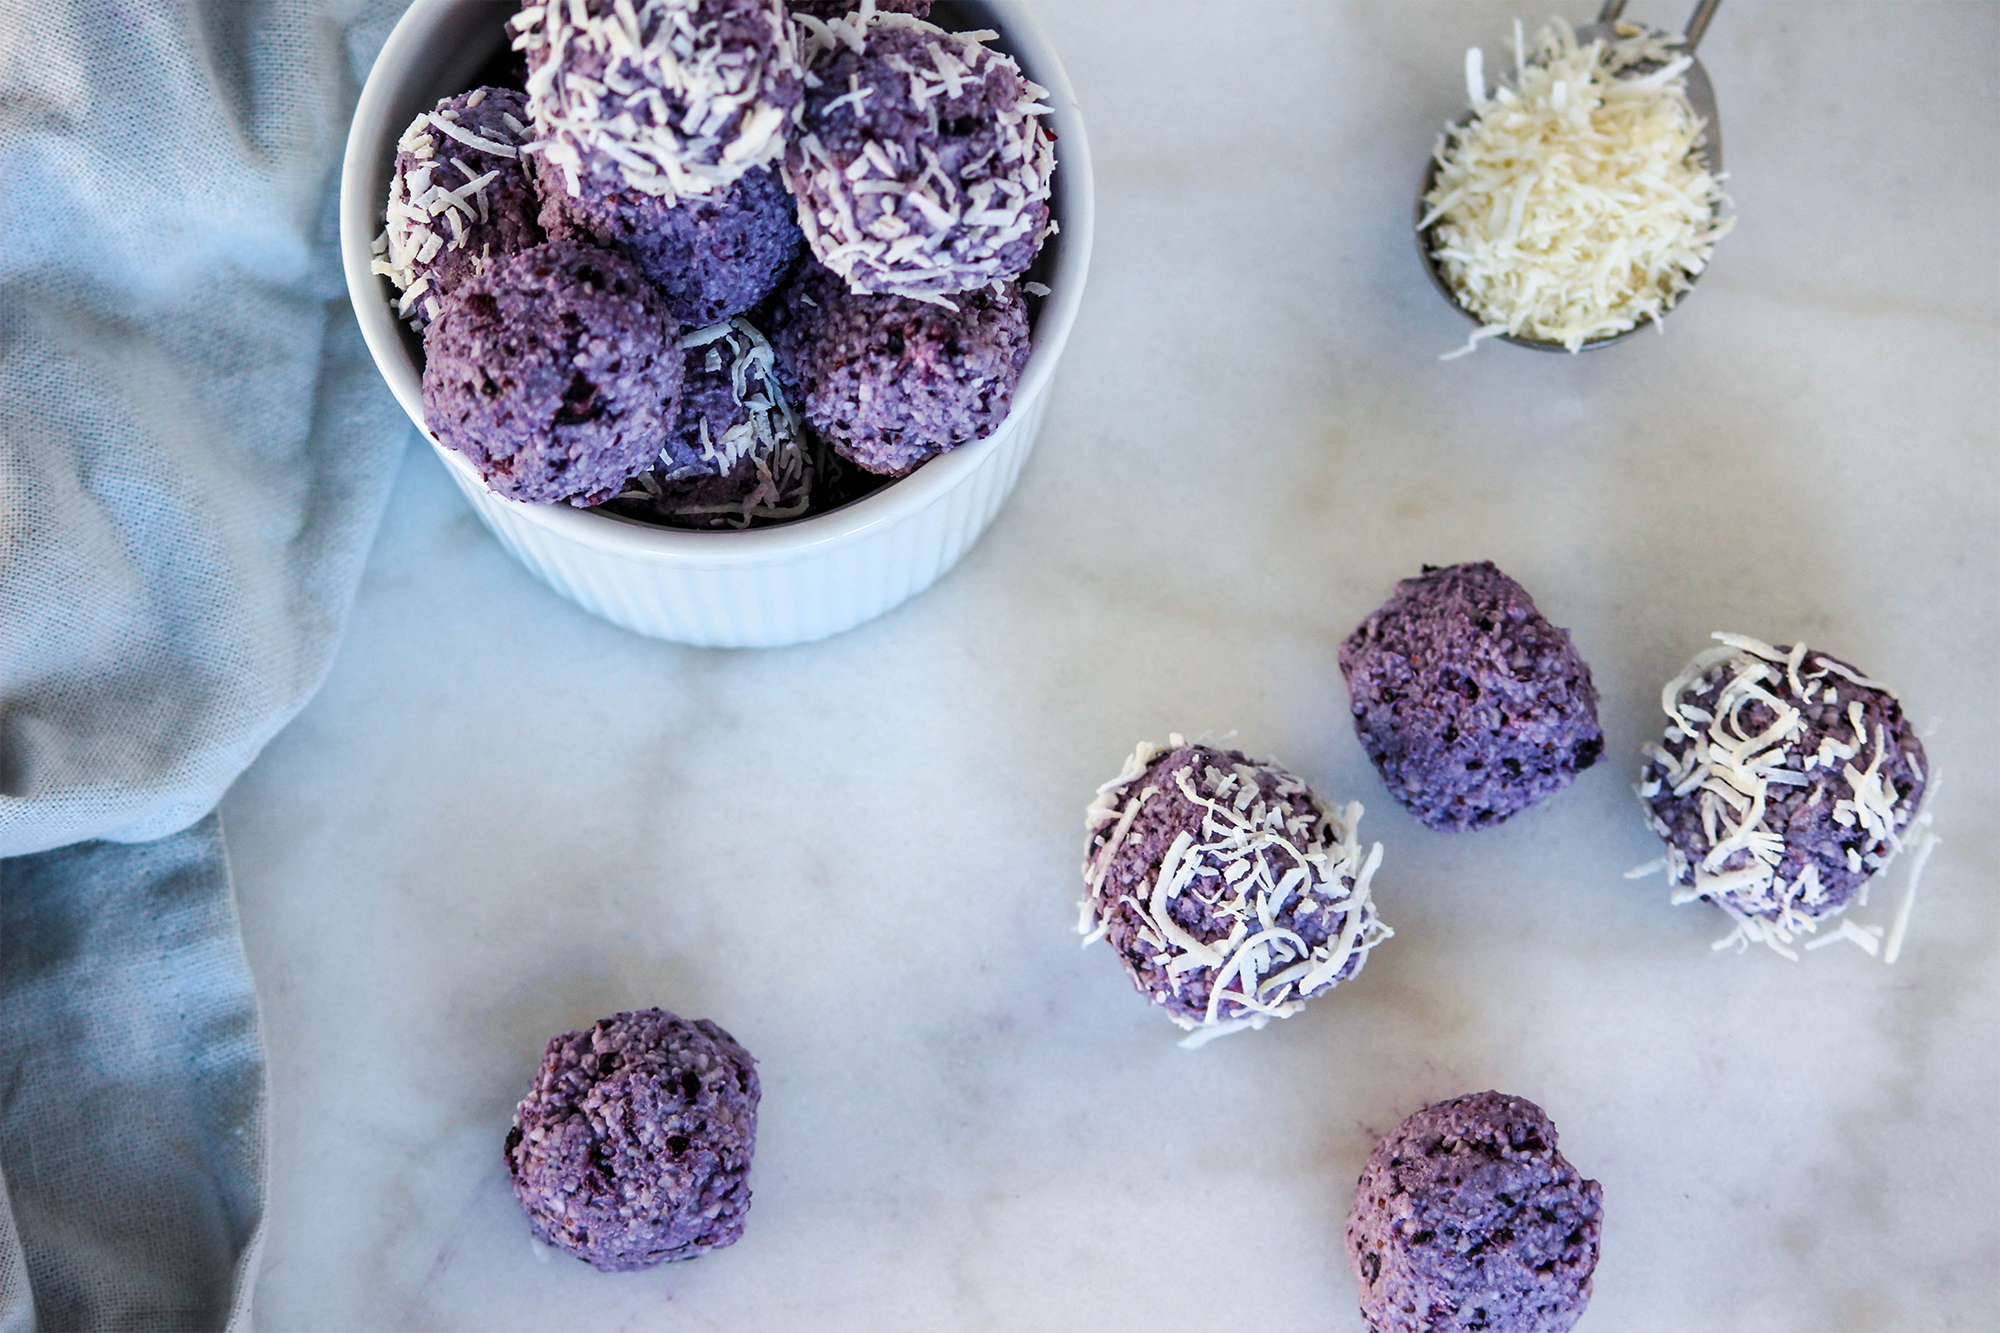
HEALTHY JELLY SLICE

INGREDIENTS
BASE:
  • 2 1/2 Cups Almond Meal
  • 1 Organic Egg
  • 1/4 Cup Coconut Oil
  • 3/4 Cup Coconut Chips
  • 4 dates
MIDDLE LAYER:
  • 1 x 400ml Can Coconut Cream
  • 2 Tbsp Organic Honey or Maple Syrup
  • 1 Tsp. Vanilla Bean Powder
  • 1 Tbsp. Grass Fed Gelatin & 2 Filtered Tbsp. Water OR 4 sheets of Leaf Gelatin
  • 2 Tbsp Coconut Butter
  • Juice from 1/2 a small lemon
JELLY LAYER:
  • 2 1/2 cups mixed berries (we use a mix of frozen blueberries, raspberries, strawberries & blackberries)
  • 1/2 Cup Filtered Water
  • Juice of 1/2 a small lemon (the other half!)
  • 2 Tbsp. Gelatin & 4 Tbsp. Filtered Water OR 8 sheets of Leaf Gelatin
  • 3 Tbsp. Organic Honey or Maple Syrup
METHOD
BASE:

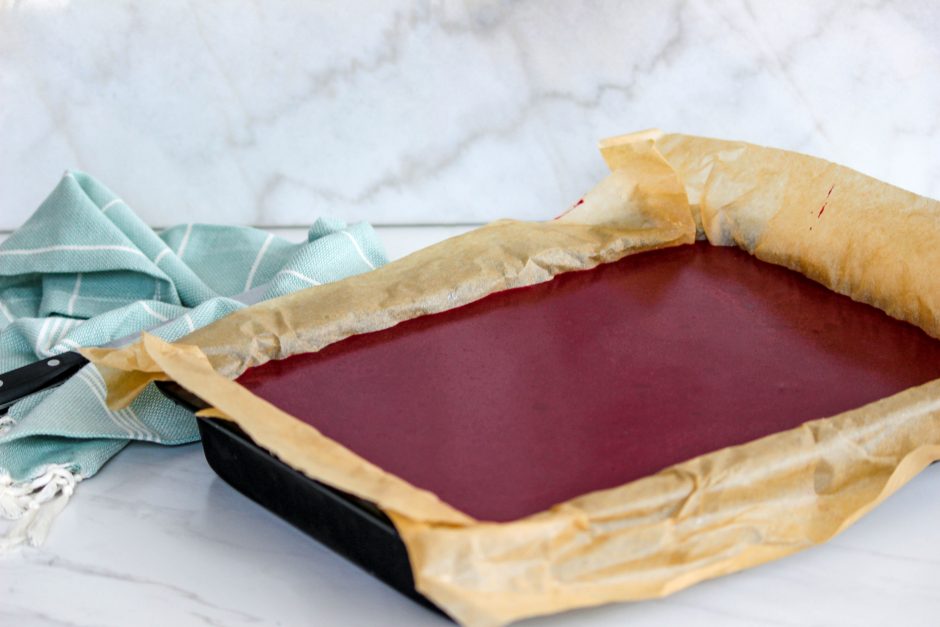
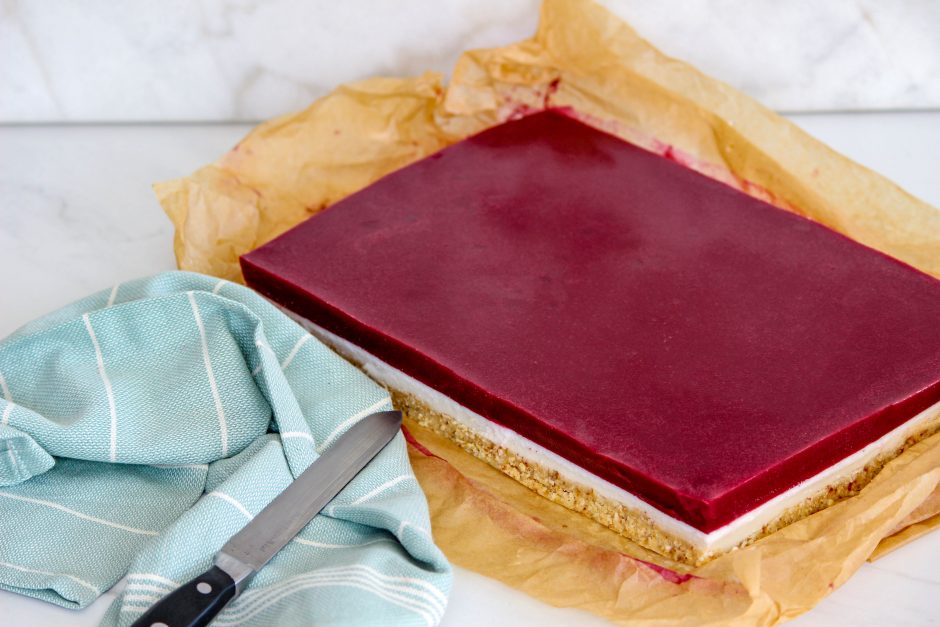
Line a square or rectangle baking dish with parchment paper. (Note that we usually use a square baking dish however this time we have used a larger rectangle baking dish because we made a double batch)

Add all ingredients for the base into a food processor & process until combined.

Firmly press mixture into the backing dish until even.

Place in the freezer to set.

MIDDLE LAYER:

Whilst your base is setting in the freezer, it’s time to work on the middle layer!

Prepare your gelatin by placing it in a bowl with cold water. (see “Gelatin Pointers” above). Leave for around 5 minutes or until the powder forms into a big ball of gel OR your sheet leaf gelatin turns big & has a gel consistency.

Place all other ingredients for your middle layer into a small saucepan & heat on a low heat. Take it off the heat just before it starts to simmer. Once off the heat add your gelatin into the liquid & stir really well to make sure there are no lumps. The gelatin should dissolve almost instantly but I always like to stir for about a minute to make sure it is lump free!

Allow mixture to cool down (you don’t want it to be piping hot!), go get your baking dish out of the freezer & pour the liquid onto the base.

Place back in the freezer to set. (Note – this usually takes around an hour or so to set).

JELLY LAYER:

Just like you did before, prepare your gelatin by placing it in a bowl with cold water. (see “Gelatin Pointers” above). Leave for around 5 minutes or until the powder forms into a big ball of gel OR your sheet leaf gelatin turns big & has a gel consistency.

Place all other ingredients for your jelly (berries, water, lemon juice & sweetener) into a high speed blender & blend until smooth.

Transfer to a small saucepan & gently heat up over a low heat (Note that if you used frozen berries it will take a little while to heat up).

Take it off the heat just before it starts to simmer. Once off the heat add your gelatin into the liquid & stir really well to make sure there are no lumps. Like before, the gelatin should dissolve almost instantly but I always like to stir for about a minute to make sure it is lump free!

Allow mixture to cool down. Once cool, go get your baking dish out of the freezer & carefully pour the jelly onto the now set middle layer.

Place back in the freezer to set. (Note – this usually takes around 30 minutes).

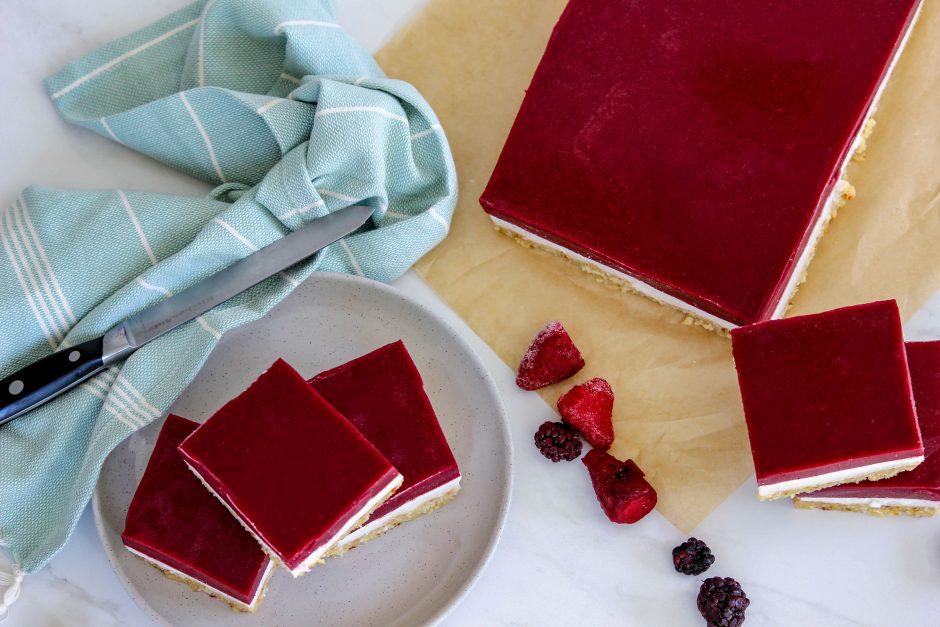
Once set, cut into squares & enjoy your health jelly slice!! 🙂


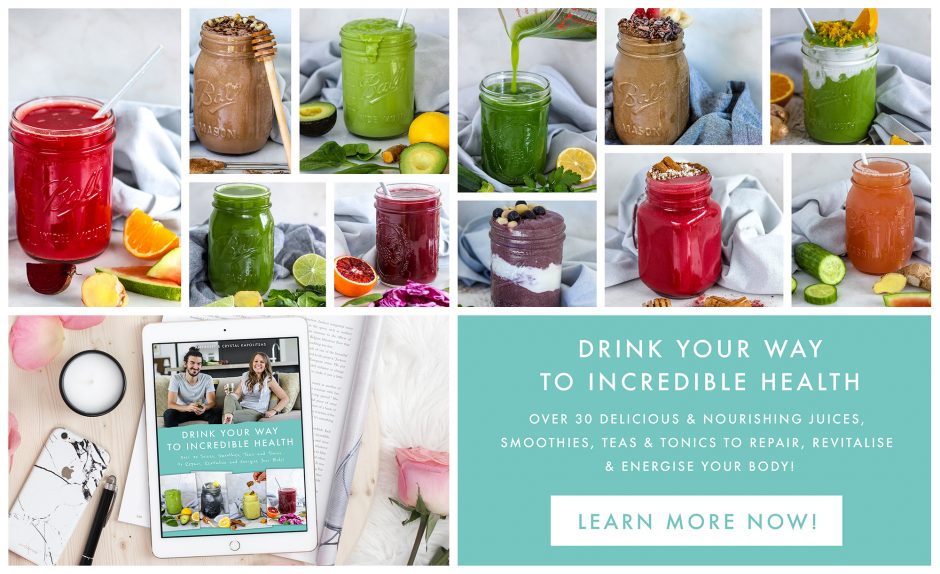
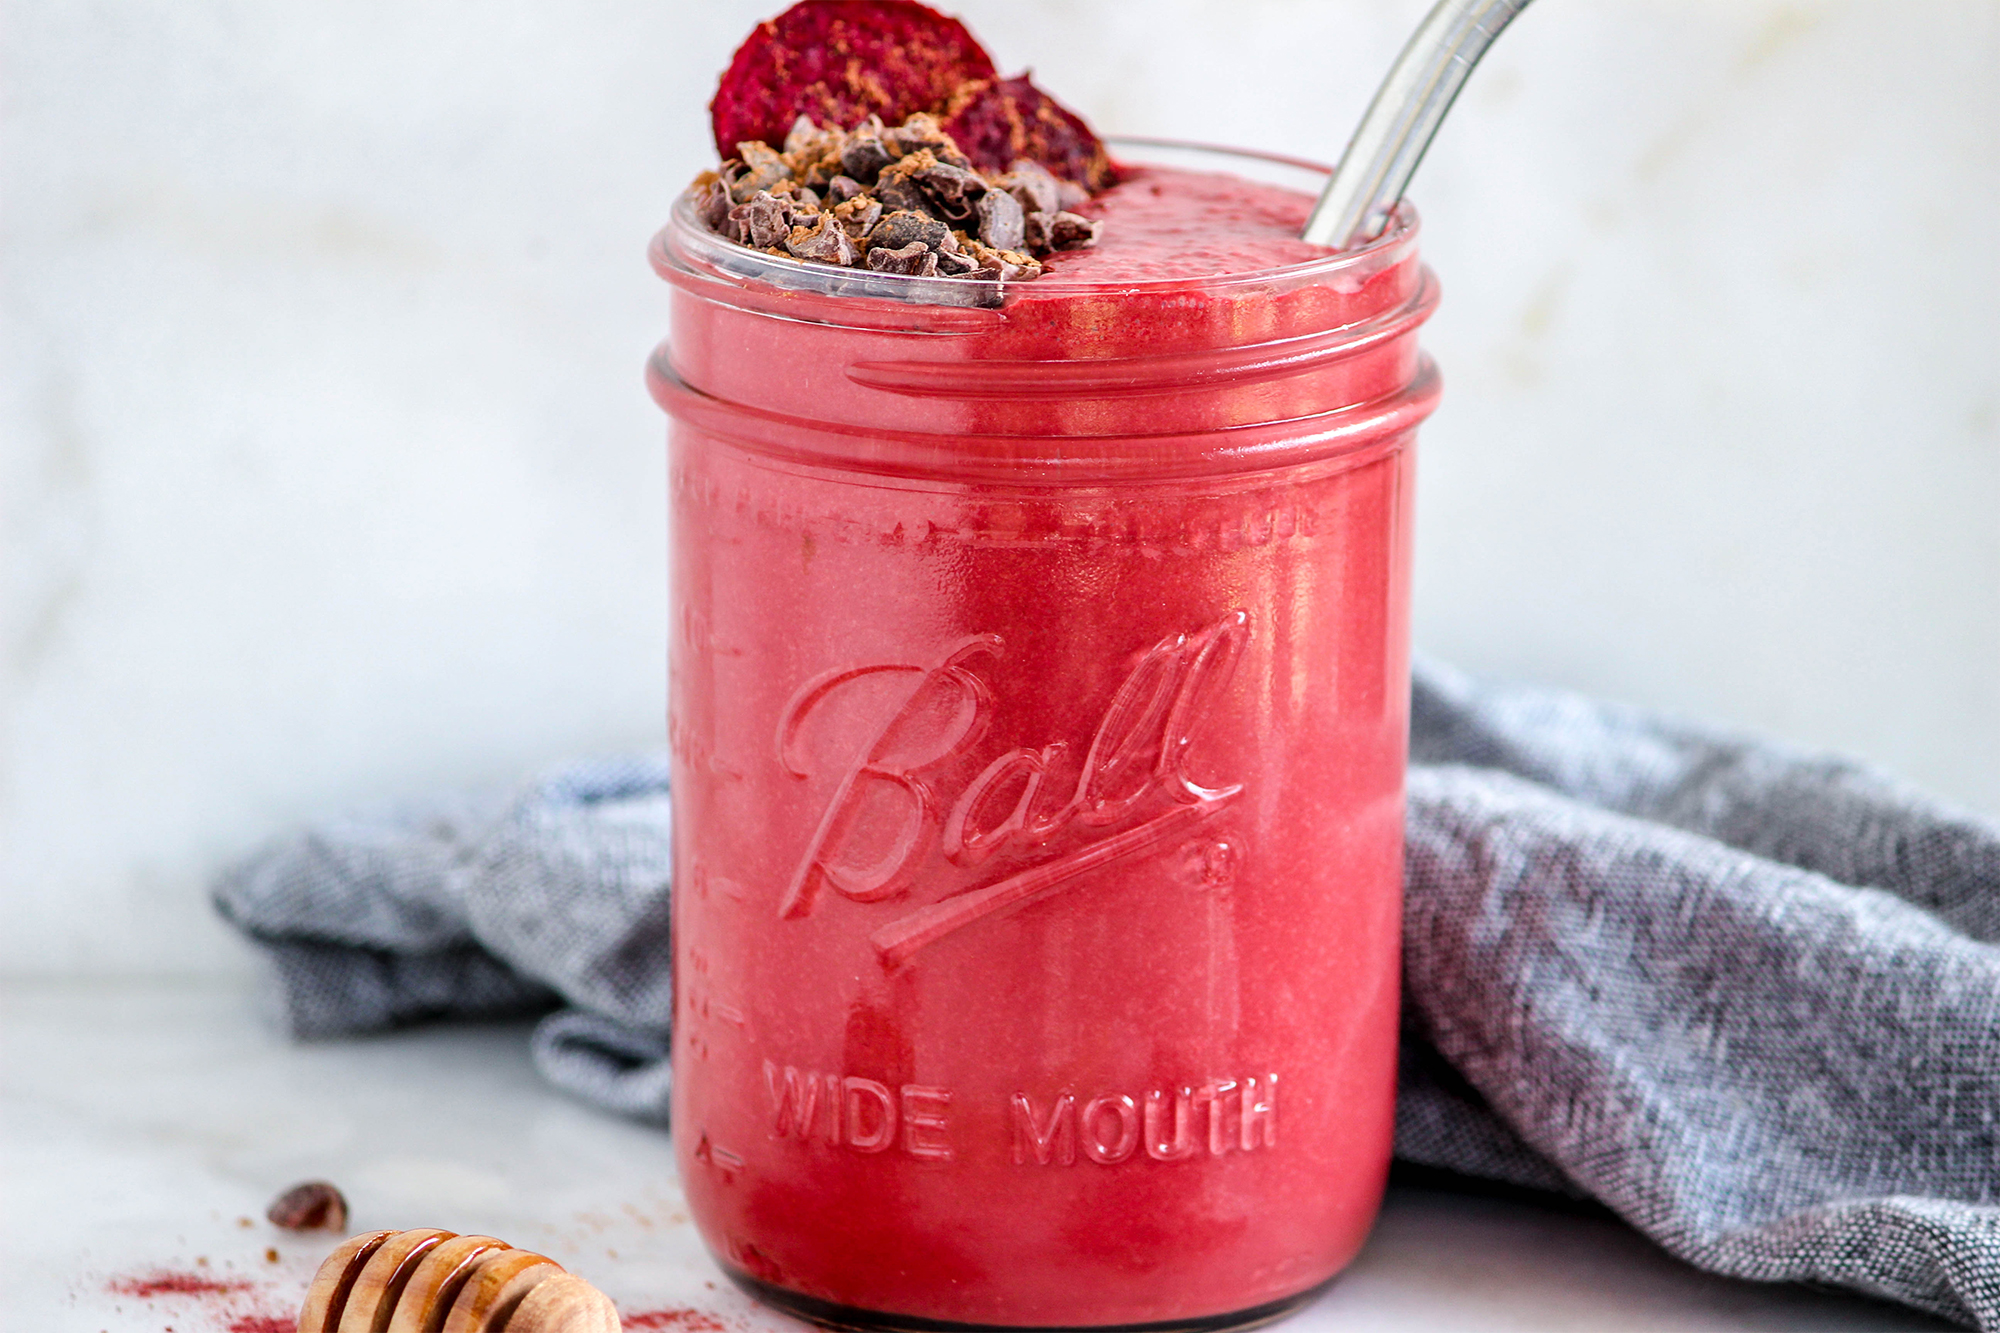
P.S If you want more delicious & nourishing recipes that will help you amp up your wholefoods ASAP, make sure you check out our new eBook Drink Your Way To Incredible Health right here! Loaded with over 30 of our favourite body-loving juices, smoothies, teas & tonics to repair, revitalise & energise your body!

Whether you’re after more energy throughout the day, a better sleep, improved digestion or maybe better skin or hair health (or all of the above!!) there’s a juice, smoothie, tea or tonic for it! All of which you’ll find in this book!

Eye Healing Blueberry Bliss Balls

Our health journey started a while back… about 5 or 6 years ago now… & in that time we’ve healed our leaky gut, balanced out disrupted hormones, cleared up bad skin, lost a tonne of weight, & taken back our lost energy that used to stop us from even getting through the day!

We like to say that we moved from surviving to thriving 🙂 & it opened up some incredible doors for us, because regardless of whatever you want to do with your life, if you don’t have your health… it’s going to be a lot harder to get it!

So, as you may already know, we solved each & every one of those health concerns with food. Removing all problematic foods (sugar, gluten, dairy, grains, processed, sprayed & GM) & replacing them with 100% organic whole foods changed everything for us.

We’d finally taken the burden off our bodies & allowed our bodies natural healing abilities to do their thing! The body is such an amazing thing & its ability to heal (when it’s allowed to do so) is incredible!

So, something else about us that you might not know… is that we both wear glasses (well, we were given prescriptions for glasses, but we don’t actually wear them, I’ll explain more in a minute)…

We were told that we’re both short sighted (our prescriptions are almost identical) & that we wouldn’t be able to see long distance without them.

At the time we just accepted that we had bad eye sight & needed glasses. But then a little while ago we realised, if we were able to heal all of our old health issues using food, why couldn’t we heal our vision too?

So, we started researching all the ways to naturally repair eyesight (what foods to eat, exercises to do, thoughts to have) & two of the most healing foods we could find when you want to improve the health of your eyes… are blueberries & coconut

Blueberries are one of the richest sources of antioxidants out there, especially anthocyanins which help to protect your eyes from oxidation & free radical damage.

Coconut is one of the best dietary sources of medium chain fatty acids, a type of fat that has been shown improve eye health as well as brain function. The fat in the coconut also allows you to better absorb the antioxidants in the blueberries (fat should always be consumed with antioxidants), so the 2 foods work together to give you healthier eyes!

Pretty cool right? Which meant that we needed a way to make sure we were consuming these eye-loving wholefoods everyday!

Enter our eye healing blueberry bliss balls!

These babies are SO EASY to make, they taste INCREDIBLE, they’re super satiating… & of course – the star ingredients are blueberries & coconut!

Now of course, even if your eyesight is PERFECT these balls will still do wonders for your body – but for those of us who need a little help in the vision department, these balls are where it’s at!!

Alright let’s get to the recipe shall we?

Eye Healing Blueberry Bliss Balls (Serves 2)

INGREDIENTS:

– 1 cup shredded coconut
– 1/2 cup coconut butter, packed
– 1/2 cup almond meal
– 2 large handfuls of blueberries
– 1/4 tsp vanilla bean powder
– 1/2 cup coconut cream*

METHOD:

Place shredded coconut, coconut butter, almond meal & vanilla bean powder into a food processor & process until crumbs form.

Now add blueberries & coconut cream & process again until all well combined.

Roll batter into little balls, coat with a little more shredded coconut if desired & place in freezer until set (this usually takes around 15 minutes).

Now enjoy your beautiful blueberry bliss balls!

NOTES:

If you’re using coconut milk instead of coconut cream (which is much thinner in consistency) you might want to use a little less than 1/2 a cup. The coconut cream helps everything stick together but you don’t want your batter to be soaking wet. 🙂

If you’re using store bought coconut cream, try to make sure it just contains coconut – no other fillers/ingredients.

Blood building beetroot chocolate mudcake smoothie

Beetroot chocolate mudcake in one easy-to-whip-up smoothie? You betcha!

This baby is such a quick & delicious way to get a good dose of body-loving nourishment, especially if you’re on the run as it literally takes a minute to whip up!

Now even though the majority of our smoothies contain green leaves, we absolutely love this smoothie for its blood building benefits (and of course its taste!)

So what exactly is blood building? Well!

  • Beetroot is rich in folate, an important B vitamin that the body uses to make (or build) red blood cells. Without enough red blood cells, your body will be unable to transport life giving oxygen to all the areas of the body it needs to!
  • It’s also a great source of nitrates, which helps to relax the blood vessels, improve blood flow & lower blood pressure

Not only that, beetroot has some other awesome benefits too:

  • It boosts detoxification & supports liver health
  • Improves physical performance
  • Can improve brain function by improving blood flow to the brain
  • Is packed with gut loving fibre

Not too shabby right?

A few other reasons why we love this smoothie:

Cacao is loaded with polyphenols, flavonoids & magnesium. It helps energy production, muscle function, improves heart & brain function & may even help to prevent cancer.

Coconut is one of our favourite sources of healthy, nourishing fats. It contains medium chain fatty acids which are easily used for energy by the body & lauric acid which is antimicrobial. Being such a good source of fat, it also helps with the absorption of other nutrients too.

Collagen plays a HUGE role in our health & it’s something that most people just aren’t getting enough of! Our hair, skin, nails, teeth & joints are all made up of collagen. It’s also incredible for your gut & liver health. Once we hit 25 we start producing less & less, so it’s important to get a good dose of collagen on the daily!

Alright – let’s get to the recipe!

Ingredients:

1 medium Beetroot, peeled & cubed
4 tbsp Cacao
1 cup Coconut milk
1 heaped tbsp Honey OR Maple Syrup
4 tbsp Coconut butter
2 tbsp Grass Fed Collagen
1/2 cup ice (4 large ice cubes)
A small handful of Cacao Nibs (optional – for decoration)

Method:

Place all ingredients except cacao nibs into a high speed blender & blend until smooth.

Pour into a mason jar & sprinkle top with cacao nibs.

Enjoy your smoothie!

P.S If you want even more delicious & nourishing recipes that will help you amp up your wholefoods ASAP, make sure you check out our new eBook Drink Your Way To Incredible Health right here! Loaded with over 30 of our favourite body-loving juices, smoothies, teas & tonics to repair, revitalise & energise your body!

Whether you’re after more energy throughout the day, a better sleep, improved digestion or maybe better skin or hair health (or all of the above!!) there’s a juice, smoothie, tea or tonic for it! All of which you’ll find in this book!

The Great Juicer Guide

Green juices are by far the easiest (& our favourite) way to load up on all those vitamins, minerals & antioxidants that your body loves!

They’re also chockablock full of chlorophyll (the pigment that makes leafy greens green!) which helps your body detox, build blood & heal woulds.

The super-awesome thing about juices is that – unlike smoothies –  all the indigestible fibre is taken out & those beautiful nutrients are easily absorbed by the body & sent straight into your blood stream, giving you a big shot of nutrition whilst at the same time, giving your digestion a nice little break & flooding your entire system with powerful antioxidants.

In short – they’re pretty powerful stuff!

But here’s the thing – for you to get the very most nutrition out of your juice… you’ll want to be putting your produce through a good juicer!

Why?

Well unfortunately – like most kitchen appliances – not all juicers are created equally…

Some juicers can heat up significantly during the juicing process which can destroy the beautiful live enzymes in your juice – kissing that gorgeous nutrition goodbye!

Some can only juice certain fruit or veg like citrus, but can’t handle fibrous leafy greens… ba bowww!

Others can do a pretty crappy job at actually getting all of that beautiful juice out of your produce… which of course will leave you with little juice & a whole lot of wet pulp… not what you’re after!

Oh… & our real pet peeve… some can leave you with nice big chunks of pulp in your supposedly ‘pulp-free’ juice! Not cool!

Now we’ve had our fair share of juicers over the years – but our latest (& greatest) one is by far the best! Which is what originally inspired us (along with many people asking  “Which juicer should I get??) to write this guide!

So whether you’re new to the juicing scene or you’re looking to upgrade – let us take you through the different types of juicers, their pros, their cons & our personal recommendations.

We’ve also given each one a Healthy Rating out of 5 which factors in the nutritional value, oxidation rate & pulpiness (is that a word?) of the juice you’ll get from each!

Enjoy 🙂

Centrifugal juicers are the most common – & unfortunately – the worst juicers you can get your hands on.

They work by using a flat cutting blade that spins the produce at a very high speed to separate the juice & pulp. Unfortunately this method produces heat & can ultimately destroy the vitamins, minerals & live enzymes.

They’re certainly not built to last, & some can have a hard time juicing anything but citrus (Bye bye green juices!)

The good news is you can generally pick one up for under $200… but the bad news – that the centrifugal juicing process kills most of that beautiful nutrition – is enough to eradicate the good. In our opinion they aren’t worth it.

Centrifugal Snapshot

Positive points:

They’re cheap & quick.

Negative points:

They introduce heat & oxygen into the juice which causes oxidation, destroying the live enzymes & goodness of the juice.

They have a hard time juicing greens & are mainly used for juicing citrus.

They generally can’t juice grasses (such as wheat grass) or things like turmeric & ginger + they’re unable to perform any other tasks other than juicing (such as making nut butters, or plant based milks etc.)

Recommendations:

None!

Healthy Rating: 1/5 STARS

Masticating juicers are ‘cold press’ juicers with one gear (or auger) that crushes the produce. The juice is then squeezed through a static screen.

Masticating juicers are a big step up from the Centrifugal juicers because they don’t produce heat, which means that the beautiful nutrition is left intact. However – once you’ve juiced your produce – you will generally need to drink it within 15 minutes to reap the full nutritional benefits – after this time the light & air will start killing off the live enzymes.

Masticating juicers don’t take that long to clean, take up very little room on your bench & can generally juice a large range of fruit & veg including leafy greens, citrus & ginger.

The pulp that comes out of your masticating juicer is never going to be completely dry – & even if you put the pulp back through the juicer, it still won’t be able to get every last bit of juice out. You’ll also find that your juice won’t be pulp free (unless you strain it through a nut milk bag).

Masticating juicers come in horizontal & vertical form, & although we’ve only had the horizontal, I’ve heard that the vertical are easier to clean but the horizontals can juice leafy greens better.

We had a masticating juicer for a number of years & it certainly served us well! They generally range from around $300-$600.

Masticating Snapshot

Positive Points:

Because they are cold press juicers, they leave the nutrition intact.

They aren’t too expensive & make an ideal ‘first juicer’.

They can juice grasses, greens & things like turmeric & ginger.

They can usually perform other functions than just juicing.

They’re usually small & compact making it a good option to travel with.

Overall a good, low cost juicer.

Negative Points:

They can be quite slow to use.

Produce needs to be cut into thin, small pieces.

The pulp won’t be dry, meaning that there will still be juice left in your produce.

The juice won’t be completely pulp free.

You’ll need to drink the juice within the first 15 minutes to get the most nutrition out of it.

Recommendations:

Horizontal: Oscar Neo

Vertical: Hurom

Healthy Rating: 3/5 STARS.

Twin gears are much like the masticating juicers, but contain two gears (augers) instead of one, which interlock & crush the produce to extract even more juice than the single gear masticating – leaving you with a less pulpy, bigger & better juice.

They can also juice practically any veg, herb, grass, fruit, bulb or rhizome, as well as perform other non-juicing functions such as making nut butters or nut milks.

You can usually store your juices for 2 days with twin gears instead of having to drink them within the first 15 minutes, however when it comes to cleaning time, it will take longer than a single gear masticating juicer!

Twin gears generally range from around $700 to $1500.

Twin Gear Snapshot

Good Points:

They can juice practically any form of vegetable, fruit, herb, rhizome or grass.

They produce more juice & less pulp than the single gear masticating.

The juice retains its nutritional value for even longer than juice from a single gear masticating juicer.

They are generally just a little bigger than the single gear masticating, allowing you to take them on the road if need be.

They can perform other functions than just juicing such as making nut butters.

Negative Points:

Like the single gear masticating juicer, they can be quite slow to use.

They can be expensive if you’re on a budget & you can easily get away with using a single gear masticating juicer in it’s place.

They can contain a lot of different parts which makes cleaning time consuming.

Even though they have 2 gears & extract more juice & less pulp than the single gear masticating juicer – they generally won’t be 100% pulp free.

Recommendations: Angel or Greenpower

Healthy Rating: 4/5 STARS.

Here we go – the best of the best.

Say hello to the Hydraulic Press Juicer. This is the juicer that we have.

Not only are they solid as an ox & built to last many many MANY moons (seriously – your friends will think you’ve turned your kitchen into a commercial juice bar), the juice that comes out of these machines is of the highest quality.

The hydraulic press is a 2 step juicer which first uses a vortex cutter to shred the produce into pulp.

This awesome little vortex cutter can cut the fibres of your produce right down to the cellular level which means when it comes to the juicing time – you get the most nutrients out of it!

The pulp is then put into a cloth bag which is pressed (by the hydraulic press) to extract all of that beautiful nutrition into a completely pulp free, beautiful tasting juice.

What we love about this juicer (apart from the fact that it extracts the most nutrition from your produce!) is that you can put a big bunch of produce down the chute at a single given time (instead of one leaf at a time) which it will then crush into pulp for you to put into the press. Although it is a 2 step juicer & you have to spend the time putting the pulp into the press (which takes about 30 seconds) – it actually works out to be a lot faster than the masticating single gear or double gear juicer.

You can also store your juice for up to 3 days which means you only need to do your juicing twice a week & you’re set!

But with any juicer of course there’s a down side. Ready for it?

They are REALLY expensive.

Brand spanking new, the latest model is priced at $2295 – however that’s in USD as they’re American. Now you have to factor in conversion to AUS dollars + shipping.

We actually purchased ours 2nd hand from someone in AUS & paid $1500 for it – It still looks brand new & will definitely be with us for the long haul – for us it was absolutely worth the investment.

Hydraulic Press Snapshot

Positive Points:

100% pulp-free juice

The pulp is completely dry so you are getting THE MOST out of your produce.

The juice has the most nutritional value compared to all other juicers.

The juice has an incredibly slow oxidation rate. This allows the juice to retain its nutritional value for up to 3 days!

You can extract juice from any fruit, veggie, grass, herb, bulb or rhizome.

As well as juicing, you can make nut butters, nut milks, chop veggies, make nice creams & process flours!

Negative Points:

It’s really expensive

It’s really loud (We wear earmuffs when making our juices :P)

It’s big & heavy. 30kgs to be exact.

Healthy Rating: 5/5 STARS.

Recommendations: Norwalk or Pure


So there you have it! The great juicer guide!

We hope this helps you in making your decision & of course if you have any Q’s just reach out!

Crystal & Anth xo

P.S If you’re looking for some nourishing & of course delicious juice recipes that will help you amp up your wholefoods ASAP, make sure you check out our new eBook Drink Your Way To Incredible Health right here! Loaded with over 30 of our favourite body-loving juices, smoothies, teas & tonics to repair, revitalise & energise your body!

Whether you’re after more energy throughout the day, a better sleep, improved digestion or maybe better skin or hair health (or all of the above!!) there’s a juice, smoothie, tea or tonic for it! All of which you’ll find in this book!

Paleo almond & sesame crusted eggplant fries with sweet chili aioli

Oh how we LOVE our almond & sesame crusted eggplant fries!

These babies make the PERFECT snack OR accompaniment to your dinner, are super simple to make & the aioli is thick, creamy & delicious!

Both the fries & aioli are really versatile. If you’re not a fan of nightshades for your fries you can swap out the eggplant for another veggie such as zucchini.

If you’re not a fan of sweet chili, you can omit the the honey & chili & just make a simple garlic aioli. Whatever floats your boat!

So what are the health benefits?

Eggplant – Eggplant contains a variety of vitamins, minerals & phytonutrients. The stand out for this awesome veggie is a type of anthocyanin (the compound that gives eggplant its purple colour) called nasunin. Nasunin is a powerful antioxidant that reduces free radical damage, protects DNA as well as the fat in brain cells from damage & helps to make iron more absorbable.

Almonds – Almonds are a great source of healthy monounsaturated fatty acids (MUFAs), antioxidants & other important nutrients. Almonds support heart health, promote healthy brain function & keep your skin looking young & healthy.

Sesame Seeds – Sesame seeds have a great number of important nutrients including fat, fibre & minerals like magnesium, phosphorous & manganese. They also contain lignans (a type of phytonutrient) that can help to balance hormones & fight cancer.

Extra Virgin Olive Oil – Olive oil is loaded with polyphenols, which is a type of phytonutrient that helps to keep the brain & heart healthy. It’s a great source of healthy fats, especially MUFAs (the same kind found in almonds) which can help to balance hormones, slow ageing & improve your mood. EVOO is also is packed with powerful antioxidants that reduce inflammation in the body.

Pretty cool right?!

Alright, now let’s move onto notes! 🙂

NOTES:

– As mentioned above, if you don’t want to use night shades, zucchini makes a great alternative.

– If you’re on a keto diet & you don’t want to use the arrowroot you can omit it completely, both ways work, however the arrowroot ultimately allows the batter to stick better & the overall texture is a lot better too (i’ve found they ‘re way more crunchy with arrowroot)

– If you don’t have nutritional yeast you can just use more almond meal in it’s place – but nutritional yeast does improve the flavour. (It gives it more of a cheesy taste).

– When it comes time to frying your fries you don’t want to over crowd the pan or you won’t achieve a great texture! It’s best to cook them in batches – I’ve found 3 batches work perfectly!

– When making your aioli you MUST MUST MUST pour the olive oil in SUPER SLOW… Otherwise it WILL NOT emulsify – meaning the oil & egg-yoke mixture won’t combine together properly & it won’t become thick & creamy like a good aioli should be. It should take you a couple of minutes to pour the oil into your processor & your aioli will gradually thicken up.

Alright – let’s get to the recipe! 🙂

Paleo almond & sesame crusted eggplant fries with sweet chili aioli

Ingredients

Almond & Sesame Crusted Fries:
1 medium size eggplant, cut into fries.
4 tbsp arrowroot flour
1 organic free range egg, whisked
1/2 cup almond meal
3 tbsp sesame seeds
3 tbsp nutritional yeast
2 big pinches of pink salt
6 tbsp coconut oil/high quality fat.
Sweet Chili Aioli: 
2 room temperature egg yokes (we use the egg whites to make cloud bread)
2 cloves garlic, minced
3/4 cup olive oil
1 tablespoon lemon juice
1/2 tsp smoked paprika
1 tsp chili flakes
1 pinch pink salt
1 tsp honey

Method

For the Sweet Chili Aioli: 
Place yokes, lemon juice, garlic, honey, chili, paprika & pink salt into a food processor & process until combined.
Whilst processor is still running, very slowly (over the course of about 2-3 minutes – refer to notes above!) pour the olive oil down the shoot. If you poor the olive oil too fast it will not emulsify – meaning it will be thin & oily – not what you want.
As the oil gets added your aioli will gradually start to thicken.
Once all olive oil has been added your aoili will be thick and creamy.
Now its time to transfer to a mason jar & refrigerate
Once in the fridge, it’s time to make your fries!

For the Almond & Sesame Crusted Fries:
Once eggplant has been cut into fries, place arrowroot flour in a shallow bowl, your organic whisked egg in another shallow bowl, & then finally your almond meal, sesame seeds, nutritional yeast & salt in another.
Mix almond meal, sesame seeds, nutritional yeast & salt until properly combined.

Now coat each piece of eggplant in arrow root, then the egg, & then in the almond & sesame mixture. Try to make sure that each side is covered evenly with the mixture.

Place 2 tbsps of coconut oil/high quality fat in a pan over medium heat & allow to heat up.

Once oil is heated, carefully place a 3rd of your eggplant fries into the pan. Fry for 2 -3 minutes on each side until both sides are golden brown.

Repeat with the next 2 batches of fries (as per notes above).

Once all batches have been cooked, take aioli out of the fridge & enjoy with a cold kombucha!

<1 / 5 >

So, so thankful to Crystal & Anth... What a brilliantly done, much needed business these two incredible health ambassadors have created.

Pete Evans
Chef, Author, TV Presenter

Keep your carrot fuelled eyes peeled for what Anth & Crystal have to share. They're passion & knowledge is helping to make both humans and the planet happier and better nourished. So thankful for all that they do!

Dr Libby Weaver
Nutritional Biochemist, Author, Speaker

Anth and Crystal are helping all of us be better humans through outstanding nutrition that grows before our eyes and for that I’m so grateful!

Dr Nat Kringoudis
Doctor of TCM, Author, Speaker

If you're looking for some fuss-free inspiration to live a healthier life, let Anth & Crystal lead the way. Their awesome combination of passion, vibrancy and knowledge will have you fuelling your body in the very best way, just as nature intended.

Amy Crawford
Founder of The Holistic Ingredient, CTC Master Therapist

Crystal and Anth are true health warriors… they walk their talk and share their knowledge freely!

Adele McConnell
Founder of Vegiehead, Author, Chef

CONNECT WITH US